3-2-1 Smoked Ribs
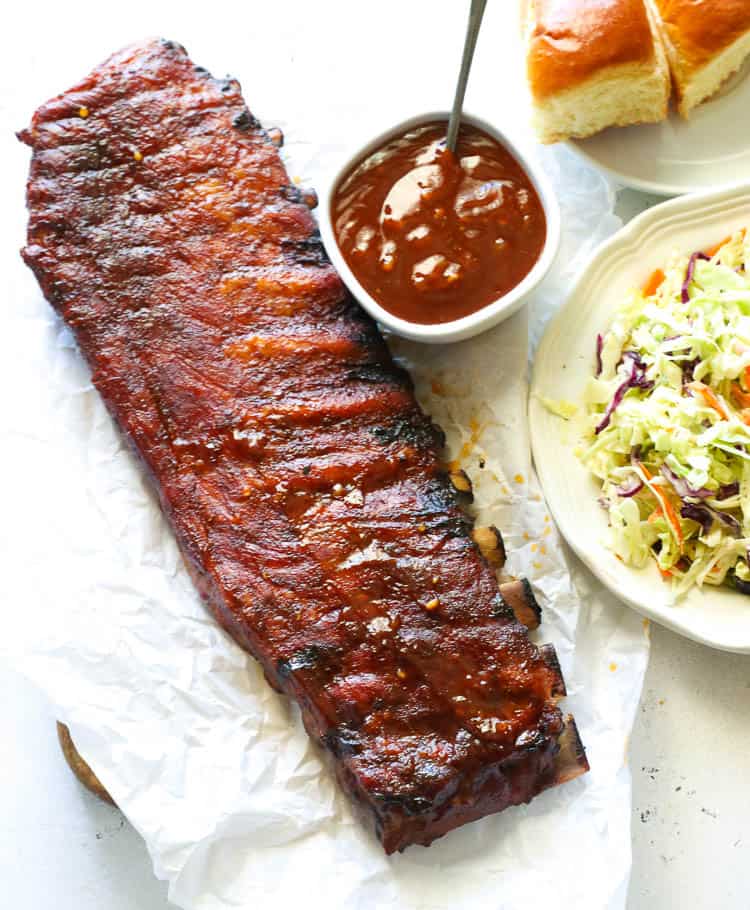
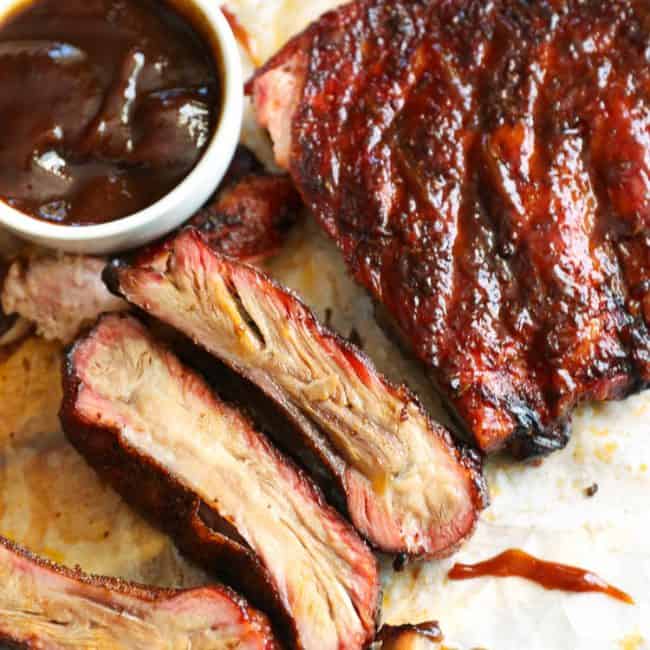
3-2-1 Smoked Ribs – Super tender fall-off-the-bone smoked ribs with the 3-2-1 method are ready to please your palate with mouthwatering, spicy goodness. It’s also an effortless way to make a drool-worthy dish that almost debones itself! What’s the 3-2-1 method? I’m so glad you asked!
Smoking baby back ribs is straightforward, especially with a simple recipe. However, making slide-off-the-bone tender ribs is a whole different story! I’m talking about melt-in-your-mouth tenderness.
I’d love to let you in on a secret. I prepare this dish to get my whole family in a good mood! It always works because my hubby and even my son adore the super tender texture. I’m going to tell you exactly how I do it, so you can make yours at home with no fuss!
Content…The Method |
The 3-2-1 Smoked Rib Method
Training in Los Angeles restaurants taught me that the customer is king! And I believe ribs for a king should always be fall-off-the-bone tender. So what’s the best way to accomplish that? The 3-2-1 smoked rib method, of course.
What is this method? Simply defined, it’s 3 hours smoking, 2 hours cooking in a wrap, and 1 hour of saucing. Here’s a more in-depth definition:
- 3 Hours of Smoking – Low and slow is the key to this dish (225-250℉/107-120℃). This initial smoking period does it perfectly. And I like my ribs with a bit of sweetness, so I use fruity woods like peach, apple, and cherry.
- 2 Hours of Wrapped Cooking – Here’s the secret to this dish’s tenderness. Wrap the ribs in foil with your choice of liquid, so the ribs steam-cook to tenderness. I also see many chefs using apple cider; yum!
- 1 Hour of Saucy Smoking – Coat your ribs with your favorite sauce, and put them back in the smoker for another hour. I use my Homemade BBQ Sauce for the most finger-licking-good 3-2-1 ribs!
Recipe Ingredients
Although this glorious recipe may look complicated, even the ingredients are super simple. Here’s everything you need for the best 3-2-1 smoked ribs recipe smoked in the convenience of your backyard:
What Cut to Use
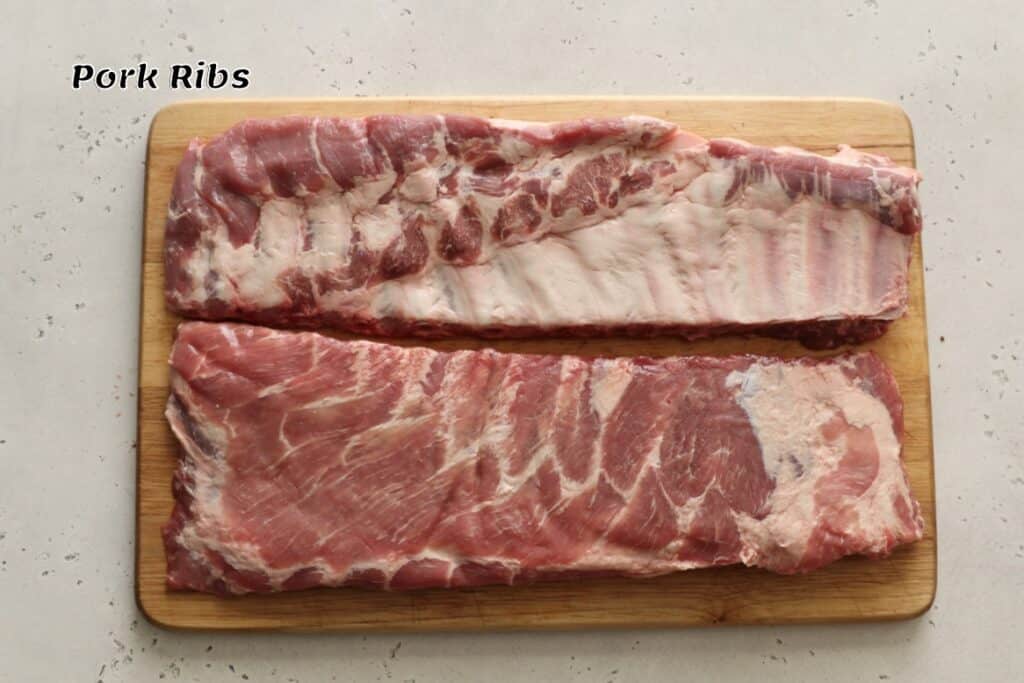
- Baby Back Ribs, Spareribs, St. Louis-style ribs – A.K.A. Baby back ribs come from the top ribs between the spine and spare ribs. Always buy bone-in ribs, and don’t settle for anything less.
Flavor Mix
- Brown Sugar – A little sweetness goes a long way, and it also keeps the meat from drying out.
- Smoked Paprika – This spice gives your dish a light sweetness and extra smokiness.
- Chili Powder – Want to make your dish more exciting? Then give it some spicy heat with this ingredient.
- Garlic and Onion Powder – These pungent ingredients add an earthy and aromatic tone to the whole dish.
- Ground Mustard – The strong earthy zing kicks your ribs up a notch or two on the flavor scale.
- Cayenne Pepper – This spicy ingredient gives you a lasting hot sensation. It’s perfect for smoking and barbecuing.
- Celery Seed – Who would have thought the celery seeds could be so flavorful? Yum!
- Thyme – I like using fresh herbs, but dried ones are better for a spice rub.
Liquid Ingredients
- Apple Juice – Who knew this childhood drink could be a delicious ingredient for smoked ribs? You can also use apple cider.
- Homemade Barbecue Sauce – Turn an ordinary dish into a lip-smacking sensation with a mix of sweet and spicy flavors all in one BBQ sauce.
How to Smoke 3-2-1 Ribs
First Smoking
- Preheat Smoker – Stoke up your smoker to 225-250℉/107-120℃.
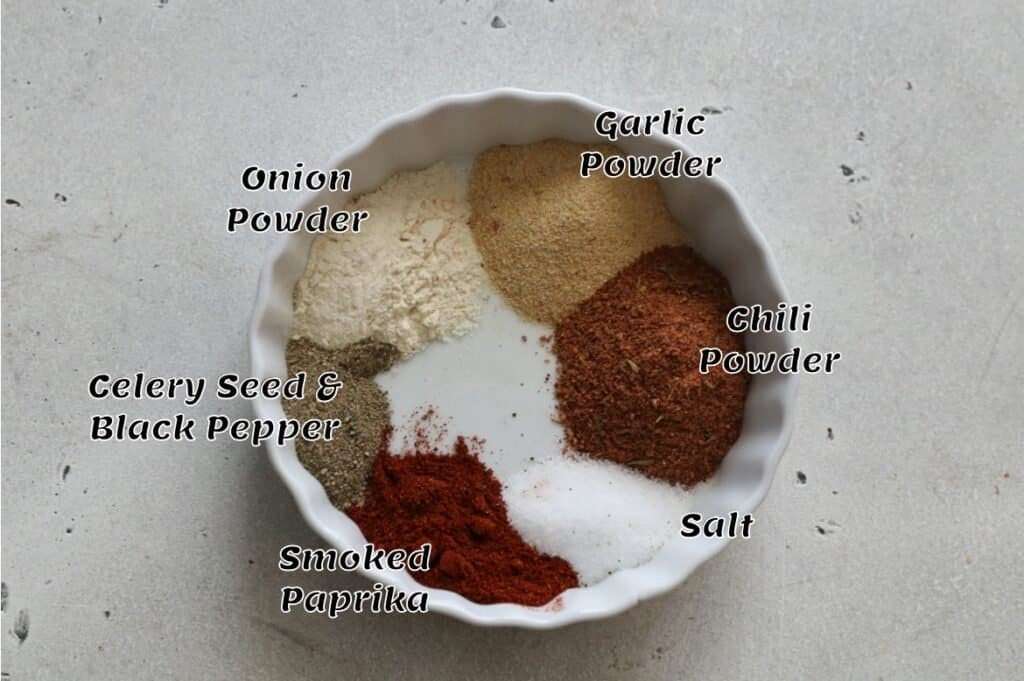
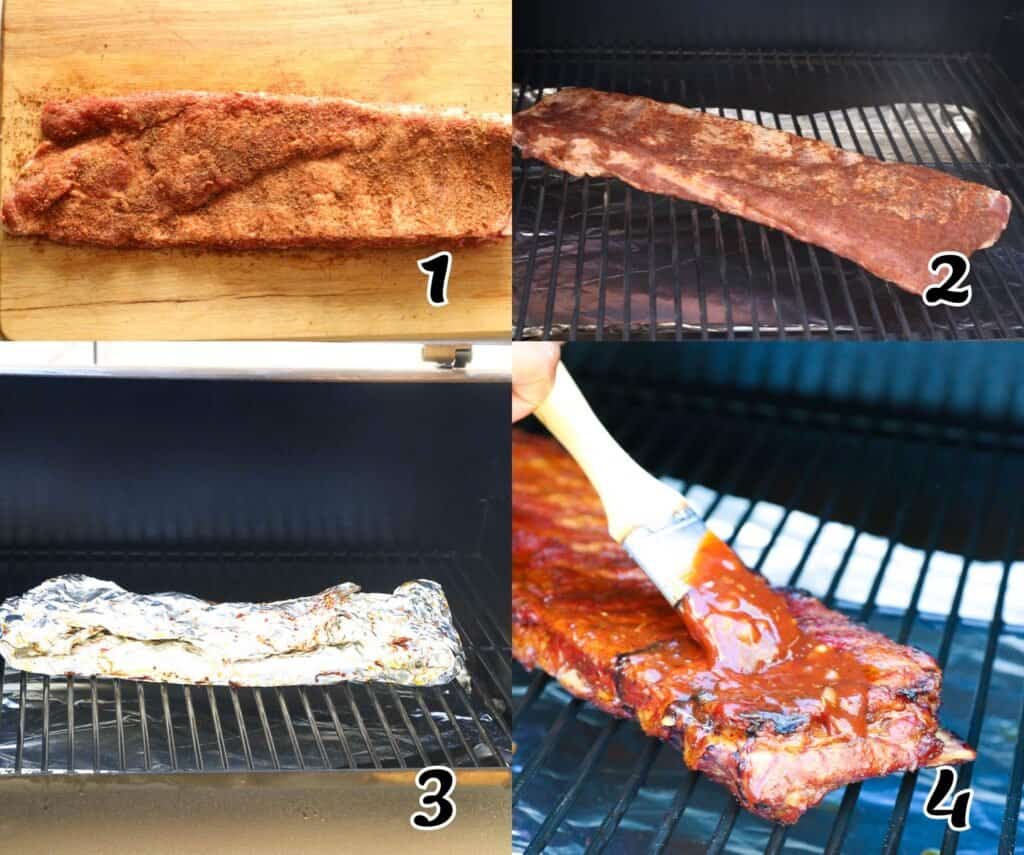
- Combine Dry Ingredients – In a small bowl, combine brown sugar, paprika, chili, garlic and onion powder, mustard, black and cayenne pepper, celery, and ground thyme. (Photo 1)
- Dry the Ribs – Then dry the pork ribs with paper towels to remove excess moisture.
- Remove the Membrane – Remove the membrane from the ribs’ backside by sliding your fingers under it and pulling it off. This part is optional, but it does help the flavor sink in deeper.
- Coat with Mustard – Rub mustard on the ribs, then generously rub both sides with the rest of the seasonings.
- Placement – Place the ribs directly on the smoker rack, meat side up, and smoke for three hours. (Photo 2)
Second Smoking
- Transfer and Wrap – After three hours, use an oven mitt to transfer the ribs to foil paper carefully, pour about ½ cup of apple juice around each piece, then wrap to seal them completely. A foil pan is another option; just cover it tightly to lock in the moisture so the ribs don’t dry out. (Photo 3)
- Second Smoking – Continue cooking for approximately 2 hours.
- Remove from the Smoker – Carefully remove ribs from the heat with an oven mitt and place them on a clean hard surface. Open slowly – watch out for the hot steam.
Final Smoking
- Coat with BBQ Sauce – Brush both sides of the ribs with homemade BBQ sauce. (Photo 4)
- Return to the Smoker – Put the ribs back in the smoker and smoke for 45-60 more minutes to get a nice, sticky layer of sauce. If the ribs are cooking too fast, remove them from the heat because you don’t want burned ribs.
- Serve – Remove and serve with pickled jalapeños, onions, BBQ beans, easy coleslaw, or potato salad. Or whatever rocks your boat!
- Enjoy!
What Smoker to Use
Pellet smokers, charcoal grills, and electric smokers are all available choices. And ribs turn out great in any of them. I usually use my Traeger Pellet Smoker to smoke ribs, but a charcoal grill works. Here are my top smoker picks:
My Choice: Pellet Smoker
Pros
- Distinct Flavor – Although pellet smokers take longer, the smoke penetrates the meat much better. Yum!
- Flavored Wood Chips – Pellets use compressed and flavored wood chips to smoke meat in a closed chamber. So you can choose your preferred flavor of wood chips.
- Indirect Heat – An indirect heat source means it’s farther from the meat, thereby cooking your meat more evenly and slower.
Cons
- It’s Bulky – So if you live in an apartment, this one may not be ideal.
The distinctive smokey taste penetrates deeper because it takes longer to smoke the meat in a pellet smoker.
How to Use a Pellet Smoker
- Meat Placement – Simply place the meat on a rack inside the smoker. Your meat cooks evenly without burning on one side because the heat source is in a separate chamber.
- Add the Water Pan – A pan with half a cup of water in the smoking chamber prevents your pork loin from drying out.
- Trap the Heat – Closing the lid traps the flavorful smoke and heat.
This method also infuses the wood chip flavor into the meat. (Apple, peach, and cherry work well for pork but feel free to mix and match.)
I get my wood chips from Traeger because their wood chips have good combustion and perfectly infuse the smoky flavor. Kingsford also makes excellent smoking wood chips.
Verdict – This is the absolute most straightforward way to smoke. The smoker automatically feeds the heater with pellets and fans the chamber. So you don’t need to get dirty; just check the meat from time to time! 👍 I love my Traeger Pellet Smoker because it’s so versatile.
Note: DON’T FLIP THE MEAT! You don’t have to flip your pork loin with this smoker because the indirect heat cooks it evenly. That’s hassle-free cooking for you!
Charcoal Grill
Pros
- Compact Unit – It’s small and convenient. Yay!!!
- Environmentally-Friendly – You don’t need electricity to enjoy your smoked pork loin, even in the great outdoors. Try smoking meat on your next camping trip!
- Low Cost – This option is more affordable and way easier to clean!
Cons
- Direct Heat – Although technically indirect, the heat source and meat are in the same chamber. This leads to slow-roasting rather than smoking, which can burn one side of the pork if you don’t turn it occasionally.
A simple, compact charcoal grill makes a fantastic smoker, especially if you don’t have much space in your backyard. Besides, it’s a little messier, so I’d probably not wear white.
Of course, a charcoal grill uses charcoal, which gives you low but direct heat. But you can also use flavored wood to infuse a smoky aroma to the bone!
Barbecuing vs. Smoking – Smoking uses slow, indirect heat so that all sides cook perfectly without turning. Barbecues use higher heat over a wood or charcoal fire, and turning is required if you don’t want one side to burn.
How to Use Your Charcoal Grill as a Smoker
- Heat the Coals – Place the hot charcoal on the far side of your grill. Put some wood chunks (not chips) next to the fire if you want extra smokiness. The chunks will smoke better than chips will.
- Keep it Moist – Add a pan with water on the grating next to the meat. Or occasionally mist the pork with water.
- Placement – Place the pork loin on the other side of the grill furthest from the coals.
- Maintain the Heat – Close the lid to start the smoking process. Maintain the internal temperature at around 225-250℉/107-120℃.
Verdict – I like this method because it’s convenient, and you don’t need a bulky unit in your backyard. 👍🏾 All you have to do is add your favorite wood along with the charcoal.
Electric Smoker
Pros
- No Direct Heat – We won’t have an open fire with this smoker: just woodchips and heating rods.
- Automatic Thermometer – The built-in thermometer tells you the smoker’s internal temperature.
Cons
- Longer Smoking Time – The lower maximum temperature takes longer to cook your pork loin.
- Electricity – You may have a higher electric bill with this smoker.
- Tastes Different – You may taste a slight difference without the authentic smoke from burning wood chips. Also, you may taste a subtle plastic flavor if you don’t preheat the smoker.
Electric smokers use wood chips to produce smoke via heating rods to produce the smoke. It also uses convection to cook the pork, giving it a different flavor. The parts resemble a bullet smoker with the wood tray substituting the fire chamber.
How to Use an Electric Smoker
- Preheat the Smoker – Add the wood chips you like to the unit and pre-smoke it.
- Attach the Water Pan – As soon as it’s the right temperature, put the water pan inside the lowest part of the unit. This may lower the temperature inside the smoker, but it assures you of a moist pork loin later.
- Placement – Place your pork loin on the rack and close the lid or door.
NOTE: If you’re using your smoker for the first time, then season your grill with cooking oil to remove manufacturing residue.
Verdict: Electric grills tend to cook at a lower temperature, which takes longer. However, I like this method because it’s easy to navigate!
Tips and Tricks
- How much seasoning depends on how many ribs you have. One tablespoon per pound is a good guestimation. But, hey, I always love just a tad more.
- My peeps won’t touch ribs without BBQ sauce, so I always make plenty. However, some prefer not to get their fingers messy, so you can use the amount your family likes.
- Removing the thin membrane isn’t a law. However, it won’t let the seasoning flavor the meat as well.
- If you want your BBQ sauce a little tangier, add a splash of vinegar to the apple juice; sweeter, add more brown sugar or honey; or spicier, add more heat. Didn’t I tell you this recipe is easy?
FAQs
This smoking process takes three parts. However, they all use the same temperature, 225℉/107℃. Trust me; the wait is so worth it.
The complete process takes 5-7 hours, and the 3-2-1 method takes six. It might take a little longer at high altitudes.
It’s the same as the 3-2-1, except the first smoke time is reduced to two hours instead of three. You can use this recipe and adjust the time for what works best for you.
What Pairs With Smoked 3-2-1 Ribs
I think that these 3-2-1 smoked ribs go well with dishes that complement the pork’s smoky flavors. So here are my top picks for the best sides of this dish.
A serving of garlic mashed red potatoes should solve your intense comfort food cravings, or roasted potatoes and carrots for a fuller meal. Then top it off with a Greek salad for a soul-satisfying dinner.
More Tender and Meaty Recipes
- Herb-Crusted Pork Loin Roast
- Pulled Pork Recipe
- Marinated Pork Chop With Rosemary and Garlic
- Pork Tenderloin Roast
Conclusion
Summer is cookout time, and these super-easy, melt-in-your-mouth ribs are the perfect summer celebration. So are you thinking about Memorial Day or the 4th of July to try this deliciousness? Give a shout-out and let me know. ❤️





One question: should mustard be in dry rub or on ribs? I put dijon on ribs and dry in rub. We’ll see. We loved the spice blend and the ribs are smoking as I write. Fifth star for finished product, which I’m sure will be great! Have enjoyed many of your recipes, love the diversity. Never disappointed! Great work!
I have used it both ways and it usually works out just fine . I recommend putting on the ribs then dry rub.
Aww, thanks so much for your kind words!
Enjoy!!
Are there any adjustments to the recipe for full rack ribs instead of baby back ones?
You can use the same recipe for both. I use either one and adjust the time. Since baby back ribs are smaller, they will take less time. Don’t forget to share how this goes. Thank you
Hi,
When you say rub mustard on the ribs, is it more dry mustard or yellow mustard, or Dijon mustard. The ingredient’s list only a teaspoon of dry mustard in the rub mix.
Buy the way, I made your Jamaican jerk chicken and your homemade jerk seasoning and cooked it under the broiler…WOW!!! Absolutely FANTASTIC!! YUM!!
Hi Susanna, It is yellow mustard – about 1-2 Tablespoons would work out.
Happy Cooking!!!