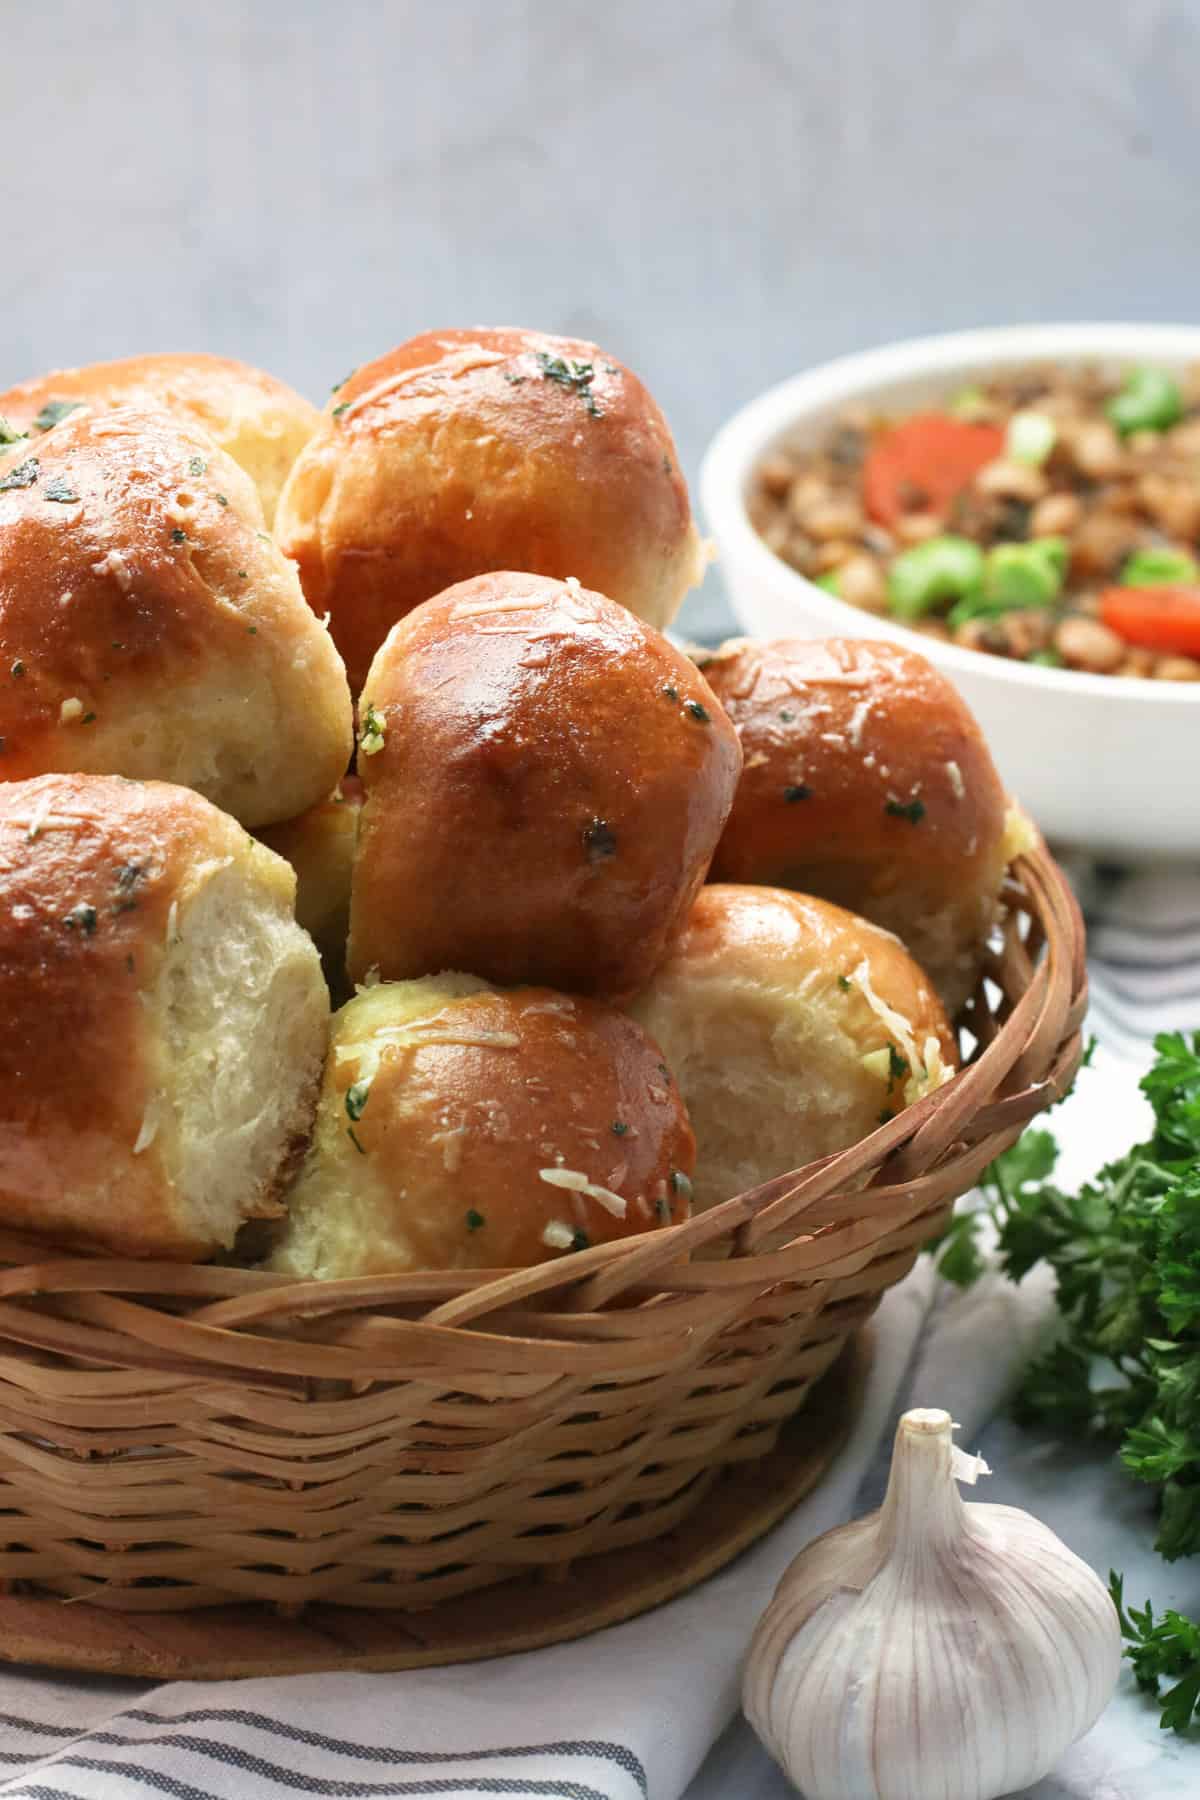
Pull-Apart Garlic Bread Rolls
Pull-Apart Garlic Bread Rolls – Garlicky, cheesy, and melt-in-your-mouth delicious bread. This incredible recipe is super easy for the perfect comfort food. The herby, yeasty tear-and-share roll will have everyone doing the happy dance. 🤤
Do you find baking bread as therapeutic as I do? This labor of love brings people together to eat and share. As a bonus, it will make your house smell amazing. It’s no wonder I have so many bread recipes here on my blog.
This particular recipe is one of my favorites, hands down. It’s super easy, and each pillowy roll bursts with that irresistible garlic bread flavor. Plus, garlic pull-apart bread is fun to share and goes great with just about any meal. It’s sure to become your new go-to bread, folks! 😋
Pull-Apart Garlic Bread Rolls – The Perfect Party Dish
As you can tell, I love making this recipe for my own family, but it’s also perfect for gatherings of any type. And garlic bread pairs wonderfully with just about everything, so you can decide on the full menu later. Plus, who doesn’t like garlic bread? This recipe is a permanent crowd pleaser guaranteed to be a hit wherever you take it.
Recipe Ingredients
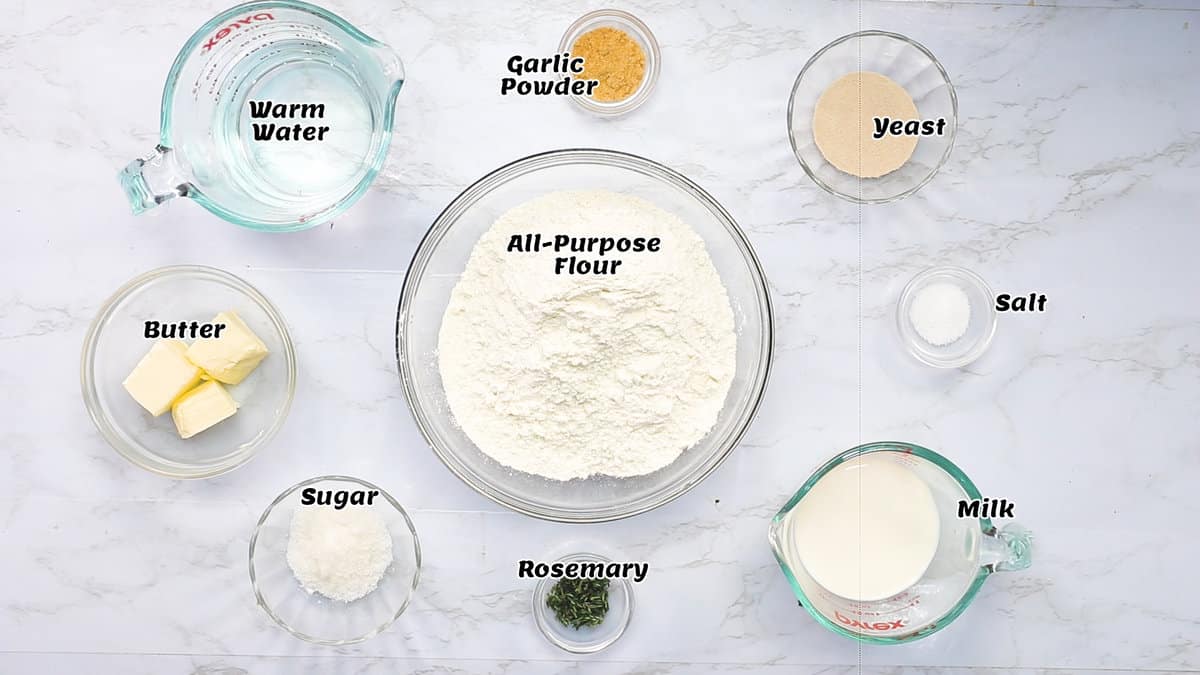
- Bread Dough – Flour, yeast, warm water, milk, and butter make the enriched dough in this recipe soft and fluffy.
- Herbs and Spices – Of course, you’ll need garlic powder for this recipe but don’t forget the minced rosemary. It complements the garlic beautifully and really takes this bread to the next level.
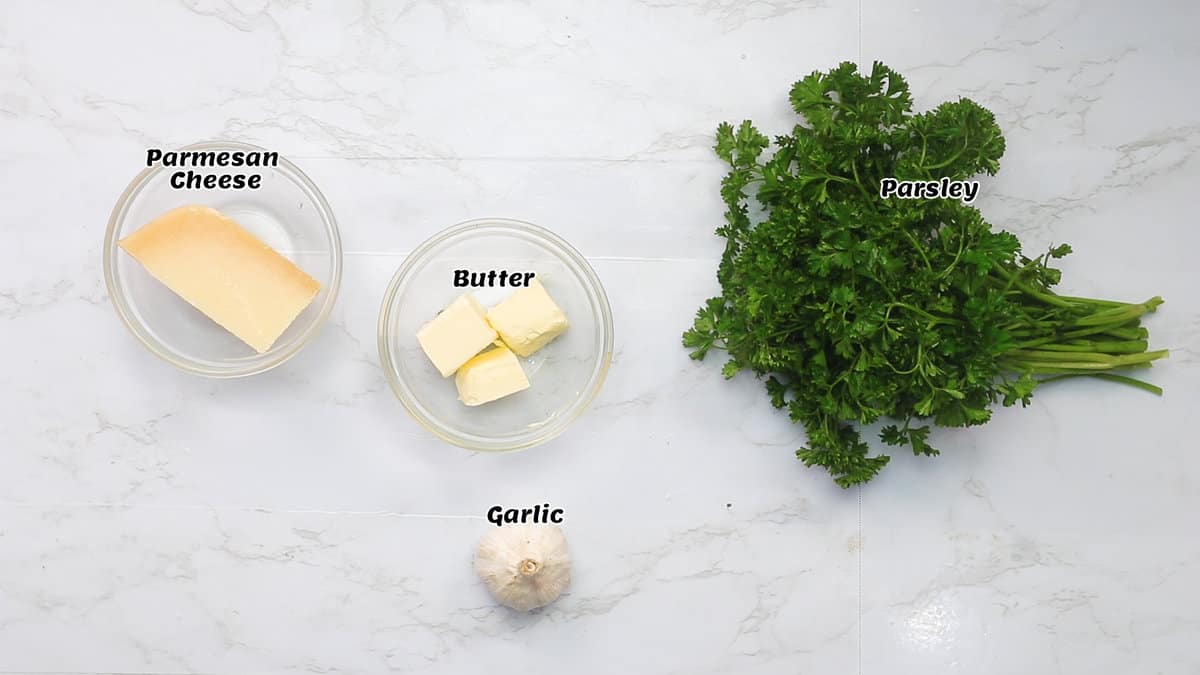
- Toppings – Butter, fresh parsley, minced garlic, and parmesan cheese are the icing on the cake, so to speak. Seriously though, the topping brings this bread to life! Don’t skip it. 😉
How to Make Pull-Apart Garlic Bread Rolls

The Dough
- Activate the Yeast – Mix warm water and yeast in a standing mixer or large bowl. Let it rest until the yeast dissolves (about 5 minutes).
- Liquid Ingredients – Meanwhile, in a medium bowl, combine milk, melted butter, sugar, salt, garlic powder, and minced rosemary. Stir until everything is well-mixed.
- Combine – Next, pour the milk mixture into the yeast mixture and mix thoroughly.
- Flour – Add about 3 1/4 cups of flour and continue mixing dough.
- Knead – Transfer the dough to a lightly floured surface. Knead for about 6-8 minutes or until the dough is nice and smooth.
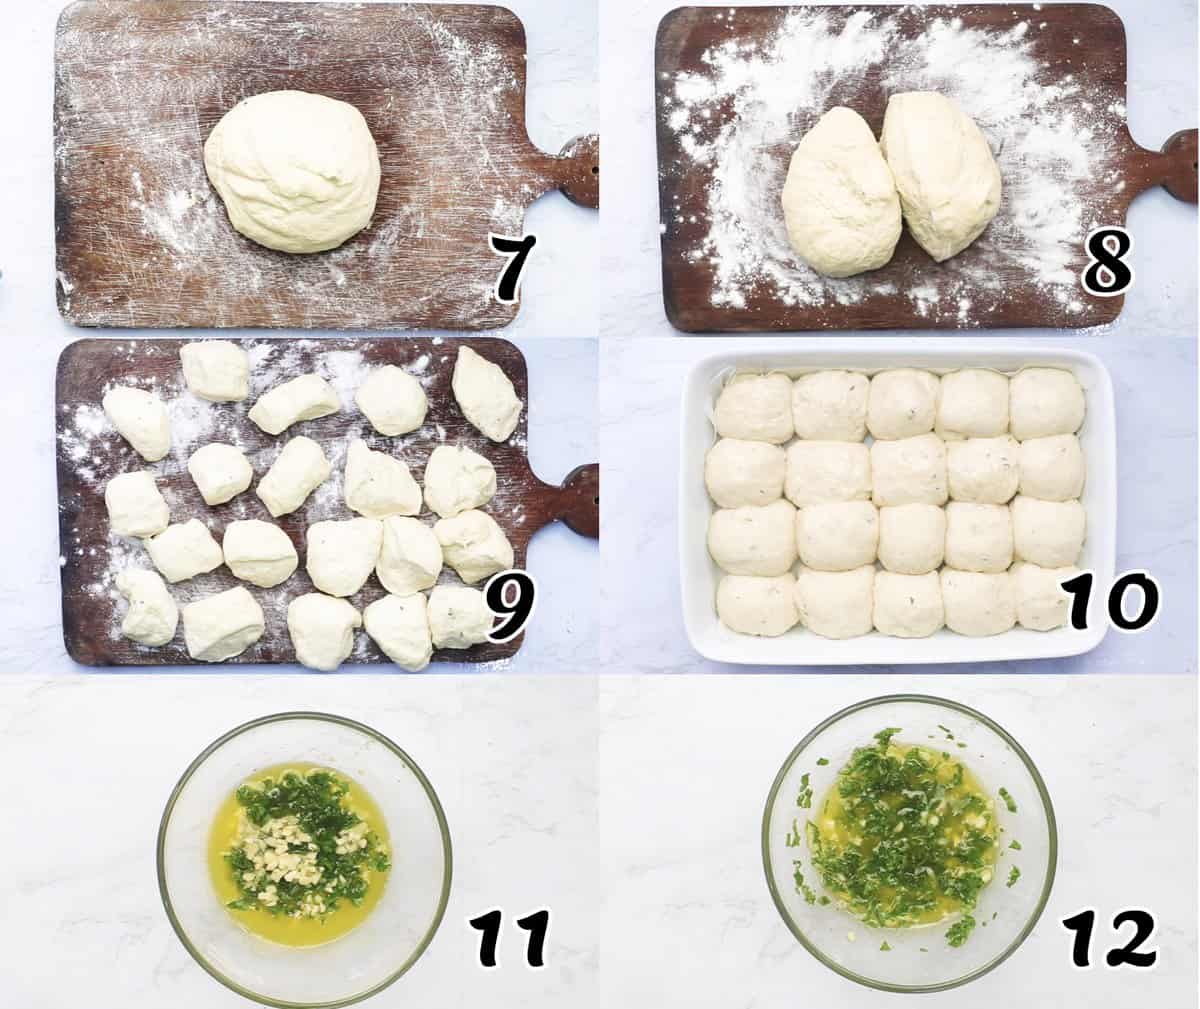
- Rise – Place the dough in a greased bowl, turning once to coat the dough. Cover loosely with a clean cloth and let rise in a warm place for 1½ to 2 hours or until doubled.
The Rolls
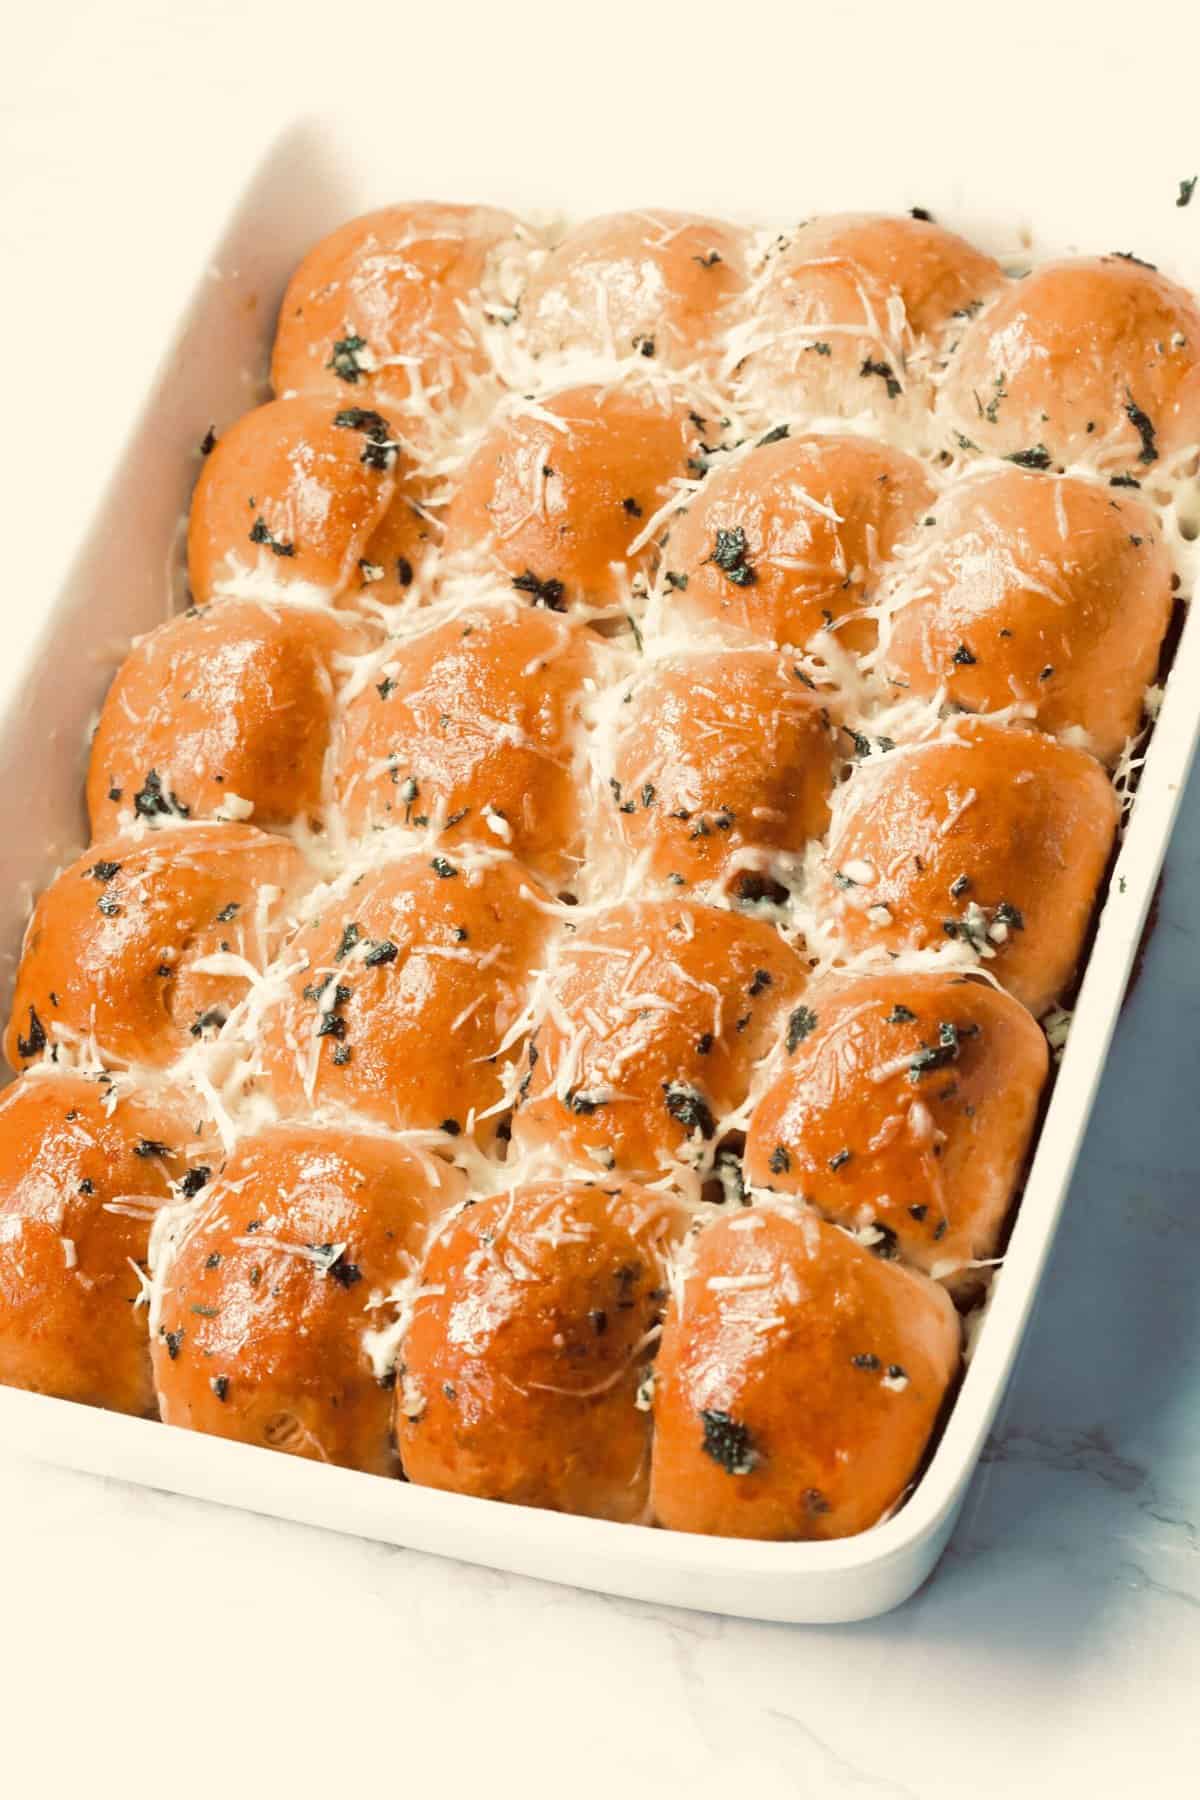
- Form Rolls – Punch the dough down and place it on a clean flat surface or board. Next, divide the dough into 20-24 pieces, and roll to form even balls.
- Grease and Wait – As you roll each ball of dough, place it into a greased 9×13-inch pan or baking sheet. Cover with a clean cloth and let rise in a warm place for about 20 minutes or until the rolls double in size.
- Bake – Finally, brush the rolls with egg wash. Bake rolls at 350 degrees Fahrenheit for about 15-20 minutes, or until golden brown.
- Garlic Butter – For the Garlic butter, mix the melted butter with the parsley leaves and minced garlic.
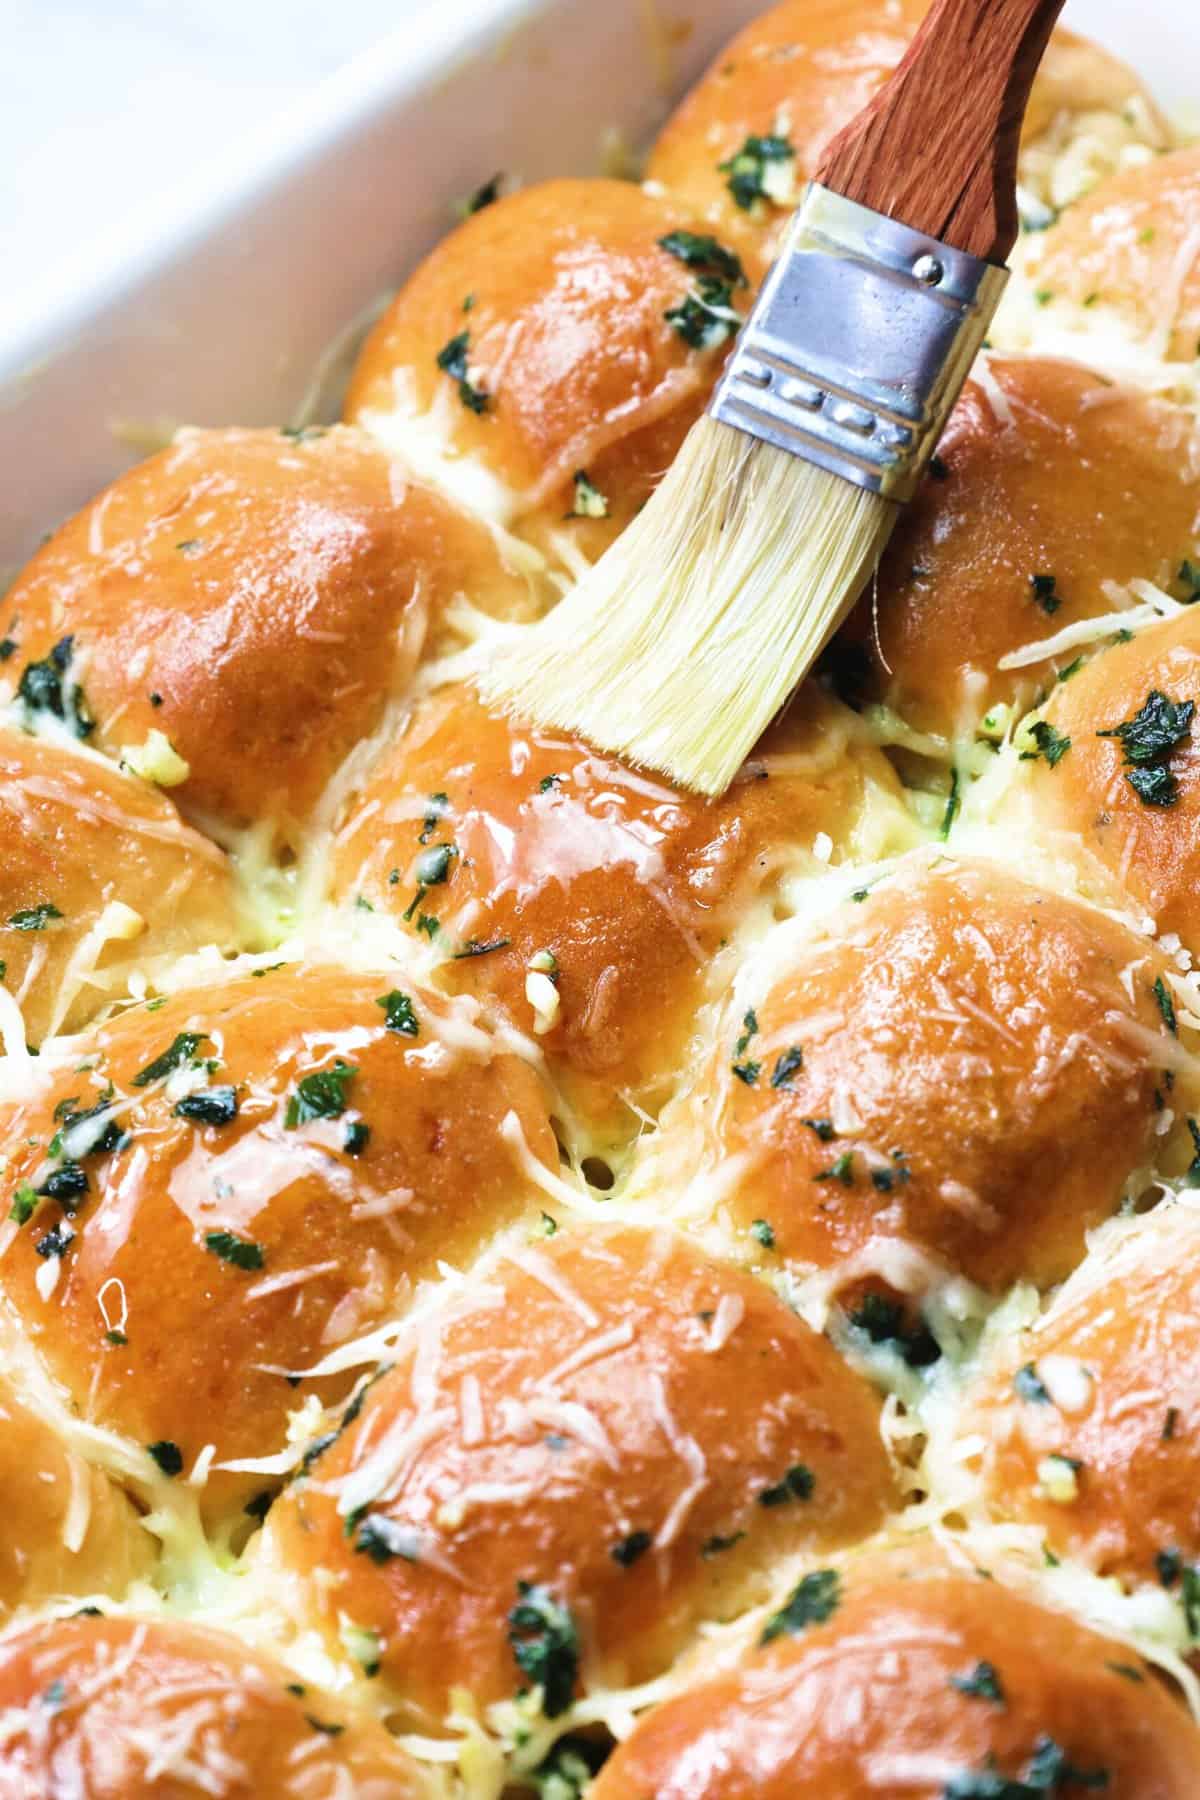
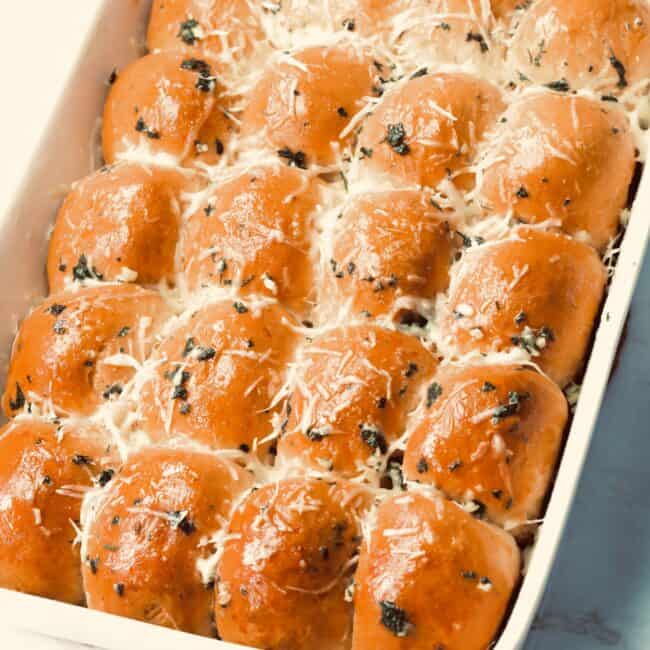
- Brush the Rolls – Remove rolls from the oven, immediately brush with garlic butter, and sprinkle with parmesan cheese.
- Melt Cheese – Finally, put them back in the oven for 5 minutes for the cheese to melt.
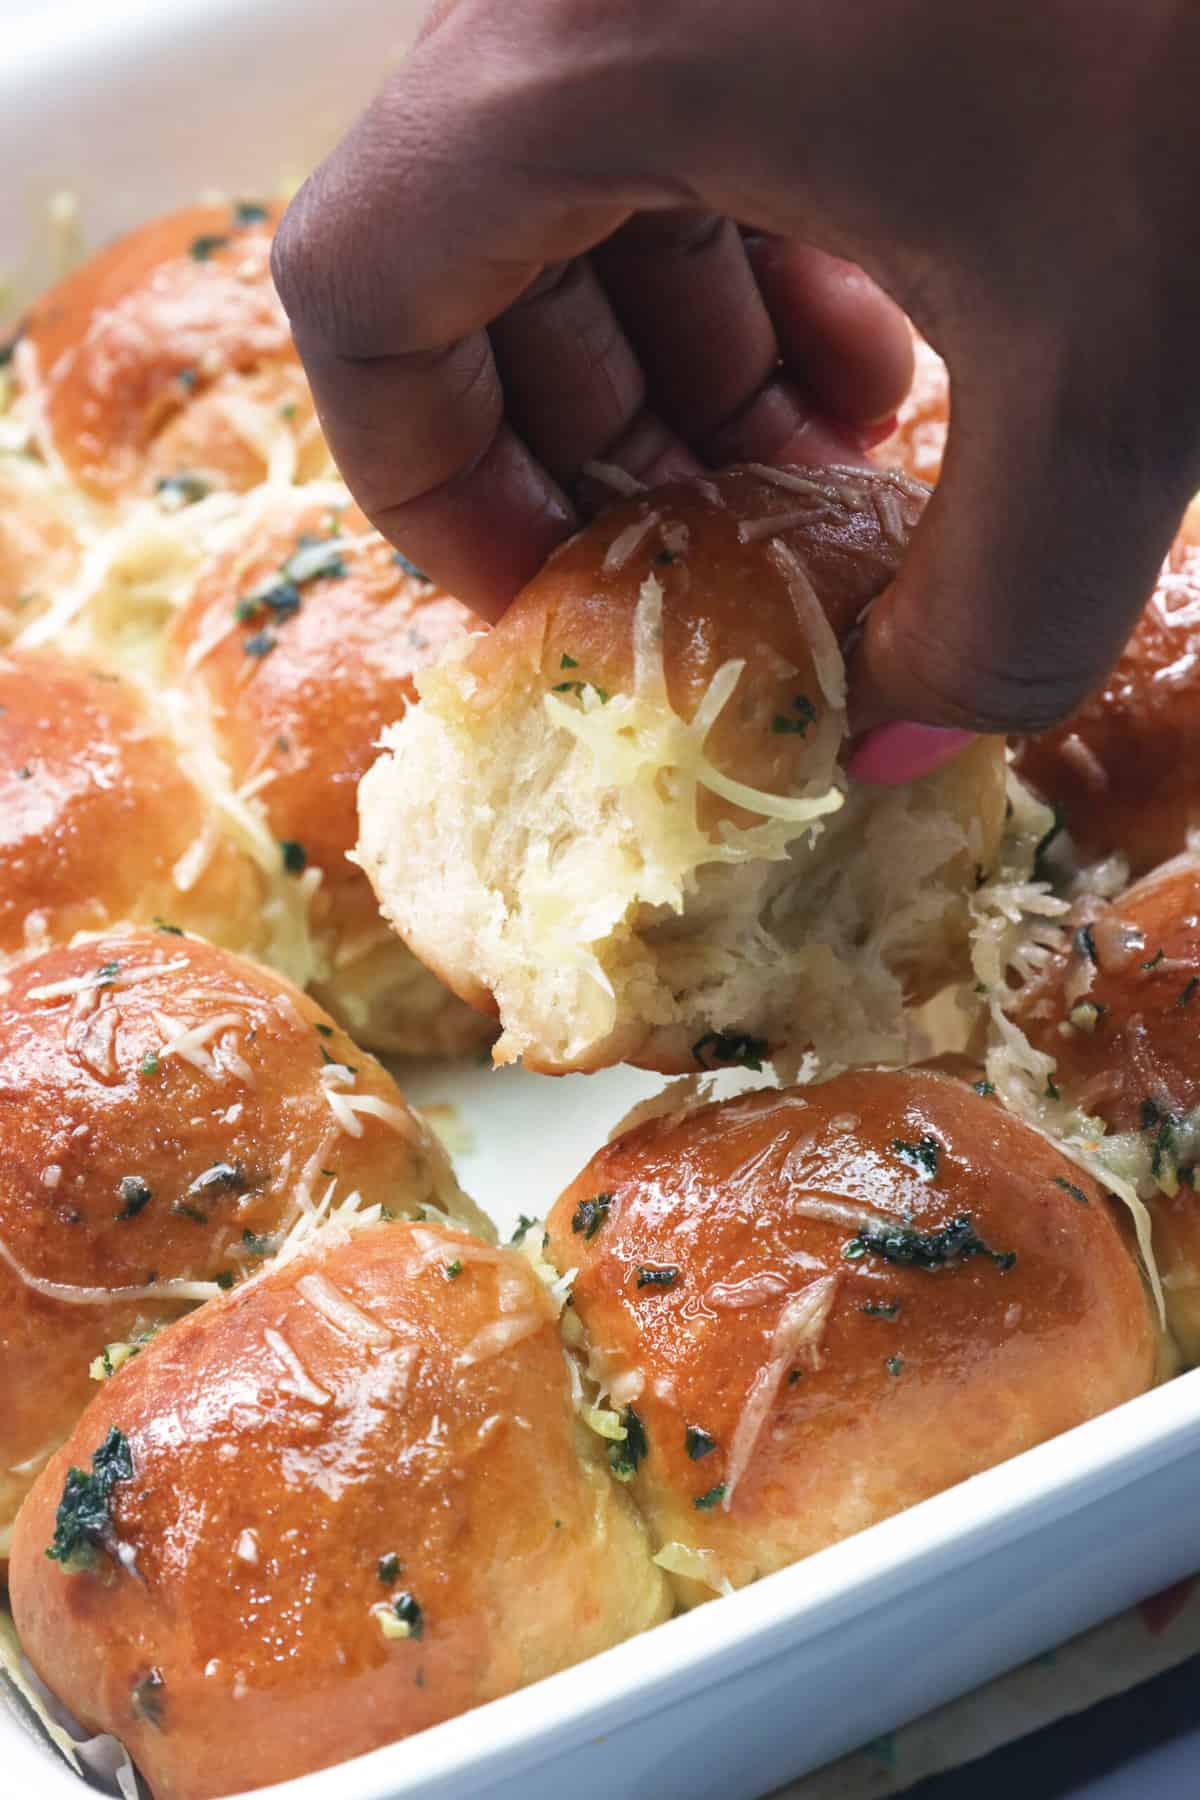
- Serve – Remove the rolls from the oven and let them cool slightly before serving.
Recipe Variations
- Herbilicious – Get creative with the herbs. I think garlic and rosemary is the perfect pairing, but you can add whatever herbs you like! Basil, thyme, or an Italian herb mix would all infuse well into this dough. 🌿
- Shape the dough however you like. I love the tear-and-share aspect of these rolls, but you can shape the dough however you want. Make it a long crusty loaf, a few small loaves, or whatever else you can think of. Just remember you may need to adjust baking times based on how big or small your dough is.
Tips and Tricks
- If your dough is too sticky while you knead, you can add additional flour little by little to make a more manageable, soft dough. However, use less flour rather than more. Because if you overdo it, the dough will become too dense.
- If you want all the rolls to be exactly the same size, use a food scale to measure their weight as you roll them out. Another easy way is to use a ½ or ⅓ cup measuring cup to measure the dough.
- To prevent your rolls from burning on the bottom, put the baking pan on top of a cookie sheet while baking.
Make-Ahead Instructions
Let’s be real; baked bread is best fresh out of the oven. But you can bake this bread the day before you want to serve it. Just store it on the countertop in an airtight container.
You can also freeze these rolls for three months. Then, for best results, thaw them out on the counter for about 30 minutes before reheating. Or you can let the rolls rise, then partially bake them before freezing. Thaw in the fridge overnight and finish baking them for a fresh-from-the-oven treat.
Serving and Storage Instructions
Serve these rolls hot, and it will be unlikely you will have any leftovers! It’s hard to say no to fresh-from-the-oven bread. 😅
If you end up with leftovers somehow, you can store them in an airtight container at room temperature for 1-2 days, no longer. Alternatively, you can freeze leftover rolls to save them for later.
To reheat frozen garlic bread rolls, thaw them out and pop them in a 350℉/177℃ oven for about 10 minutes. You could also reheat individual rolls in the air fryer at 350℉/177℃ for a couple of minutes. A microwave is an option, but it tends to toughen the bread.
FAQs
There’s actually a scientific reason for that. The rich combination of flour, sugar, salt, and fat from the butter and cheese, plus flavorful herbs, make this bread hard to resist. And it helps us produce serotonin (the feel-good hormone). So it’s the body’s way of asking for what makes it feel good.
Kinda, but not the garlic bread you might be thinking of. Italians usually enjoy garlic rubbed on toasted bread with olive oil instead of butter. And instead of using baguettes like we do in the States, they toast bread like ciabatta.
Let your taste buds decide! Some people love to up the garlic ante. Just keep in mind you probably shouldn’t consume more than two cloves of garlic daily. I know it’s good, but more than that could cause digestive issues. 😬
What to Serve With Pull-Apart Garlic Bread Rolls
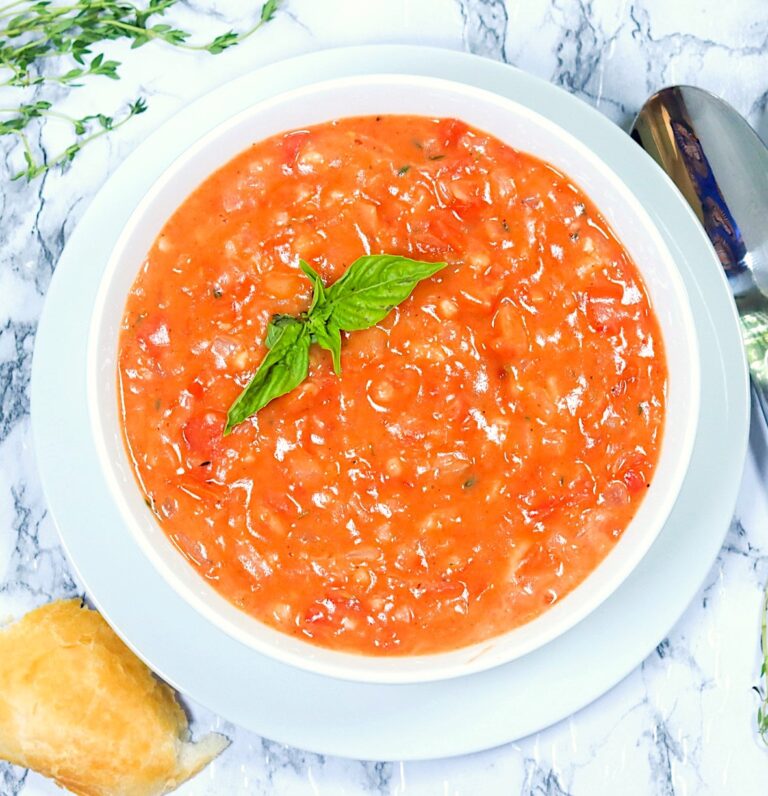
Um, everything. 😆 But here are my top suggestions: Firstly, soups! Try this bread when you make broccoli cheese soup, French onion soup, or cream of mushroom soup. Or you could serve it with your family’s favorite pasta like baked ziti or beef stroganoff.
Pull-apart garlic bread is also great for dipping, so consider serving it with some kind of sauce. I like to eat it with roasted red pepper sauce or even homemade pizza sauce, which has that lovely marinara tang.
More Satisfying Bread Recipes to Try
- Potato Bread Rolls
- Samoan Coconut Bread Rolls (Pani Popo)
- Mexican Cornbread
- Homemade Breadsticks
- Garlic Knots
- Cinnamon Roll Monkey Bread
Conclusion
If you haven’t tried this recipe yet, go for it! But be warned, if you let your friends try it, they’re going to ask you to make it again and again and again. 😜 What did your family of this recipe? Let me know below in the comments.🤩
Watch How to Make It
[adthrive-in-post-video-player video-id=”meBZZScB” upload-date=”2022-09-05T16:14:26.000Z” name=”GARLIC PULL APART BREAD.mp4″ description=”Pull-Apart Garlic Bread Rolls are garlicky, cheesy, and melt-in-your-mouth delicious. This incredible recipe is super easy for the perfect comfort food. The herby, yeasty tear-and-share roll will have everyone doing the happy dance.” player-type=”collapse” override-embed=”false”]
Pull-Apart Garlic Bread Rolls
Ingredients
Garlic Bread Rolls
- 1½ teaspoon (3g) active dry yeast (one package)
- ¼ cup (60ml) warm water (approx. 105℉/40℃)
- 1 cup (240ml) milk
- 4 tablespoons (56g) unsalted butter, melted
- 3 tablespoons (37.5g) sugar
- 1½ teaspoon (6.25g) salt
- 2 teaspoons (3.5g) garlic powder
- 1 tablespoon (1g) rosemary, minced
- 3¼-3½ cups (400-435g) all-purpose flour, plus more for dusting
Garlic Butter
- 4 tablespoons (56g) butter, melted
- 1-2 tablespoons (3-7g) fresh parsley, chopped
- 2-3 cloves garlic, finely minced
- Parmesan cheese, grated for topping
Instructions
Garlic Bread Rolls
- Mix warm water and yeast in a standing mixer or large bowl. Let it sit until dissolved (about 5 minutes).
- Meanwhile, in a medium bowl, combine milk, melted butter, sugar, salt, garlic powder, and minced rosemary. Stir until everything is well-mixed.
- Pour the milk mixture into the yeast mixture and mix thoroughly.
- Add about 3¼ cups of flour and continue mixing the dough. Add additional flour (if needed) to make a soft dough. Use less flour rather than more.
- Transfer the dough to a lightly floured surface. Knead for 6-8 minutes or until the dough is nice and smooth.
- Place dough in a greased bowl, turning once to coat the dough. Cover loosely with a clean cloth and let rise in a warm place for 1½ to 2 hours or until doubled.
- Punch the dough down and place it on a clean flat surface or board.
- Next, divide the dough into 20-24 pieces, and roll to form even balls (for accuracy, use a food scale).
- As you roll each ball, place it into a 9×13 greased pan or baking sheet. (Place the baking pan on a cookie sheet to prevent the rolls from burning on the bottom.)
- Cover with a clean cloth and let rise in a warm place for about 20 minutes or until doubled.
- Brush rolls with egg wash and bake at 350℉/177℃ for 15-20 minutes, or until golden brown.
Garlic Butter
- Mix melted butter with parsley and minced garlic.
- Remove rolls from the oven and immediately brush them with garlic butter and sprinkle parmesan cheese. Put them back in the oven for five more minutes for the cheese to melt.
- Let cool slightly before serving.
Tips & Notes:
- If your dough is too sticky while you knead, you can add additional flour little by little to make a more manageable, soft dough. However, use less flour rather than more. Because if you overdo it, the dough will become too dense.
- If you want all the rolls to be exactly the same size, use a food scale to measure their weight as you roll them out. Another easy way is to use a ½ or ⅓ cup measuring cup to measure the dough.
- To prevent your rolls from burning on the bottom, put the baking pan on top of a cookie sheet while baking.
- Please remember that the nutritional information is a rough estimate and can vary significantly based on the products used in the recipe.
Thanks for the recipe!! Will have to make
Sure, go ahead and try this. Don’t forget to share how it goes:)
This recipe looks amazing! Thank you:)