Blue Velvet Cake
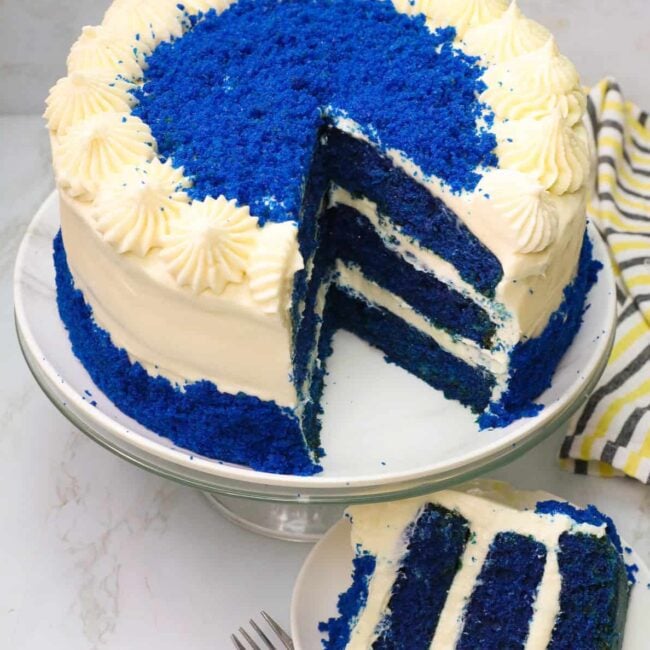
Blue Velvet Cake delivers a unique melt-in-your-mouth cake that’s a feast for your eyes and taste buds! This superbly moist, triple-layer cake, with vibrant color and thick, creamy frosting, is the perfect way to spoil your loved ones. And it’s the ultimate celebration cake for any occasion.
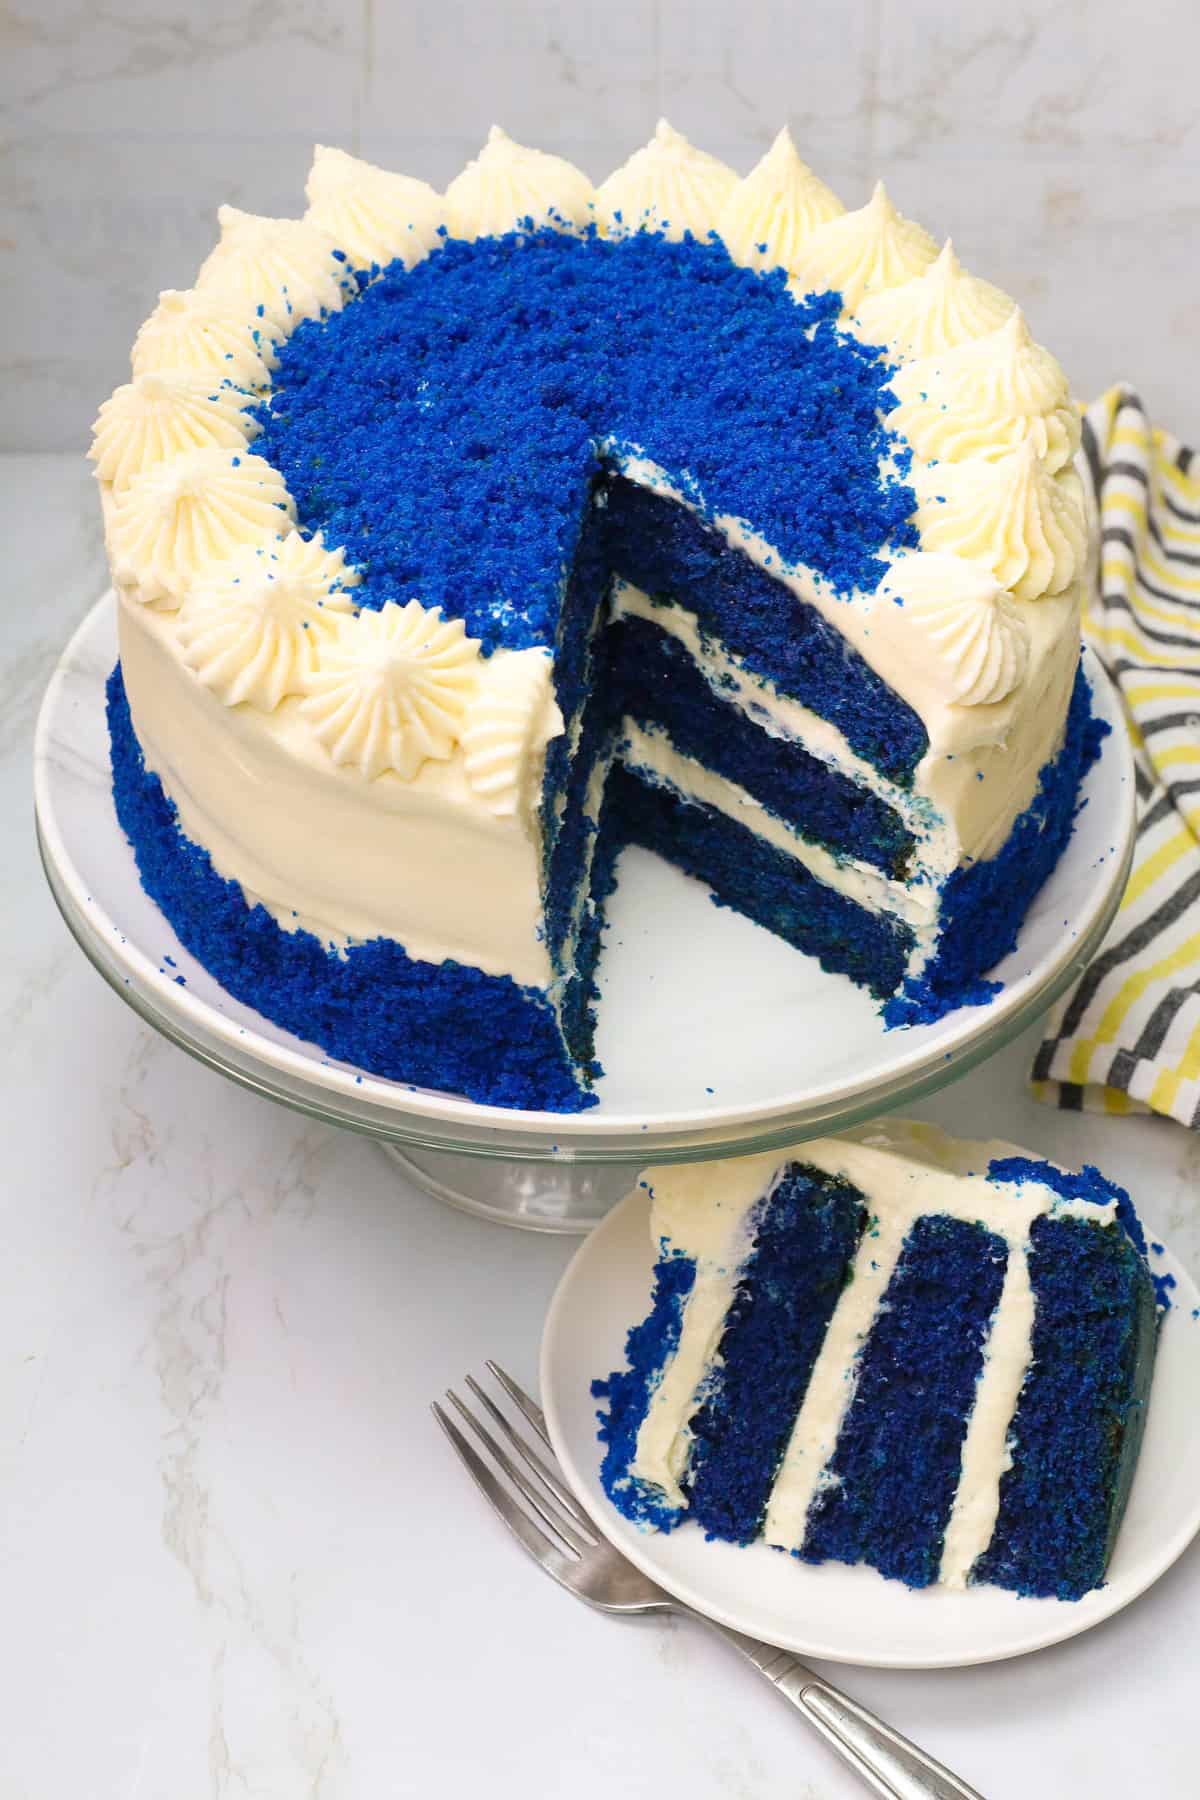
The first time I saw a blue velvet cake, I was mesmerized. The 3-layer wonder was impressive enough from the outside with its white, creamy frosting. But the biggest wow factor was the unexpected, bold pop of blue when we cut into it!
Of course, I couldn’t wait to get home and try it out in my kitchen. Since then, I’ve taken blue velvet cake to baby showers, holiday parties, and summer picnics for a guaranteed crowd wowwer! Fluffy texture, buttery flavor, and bold color… it’s a perfect 10 across the board!
What Makes Blue Velvet Cake Special?
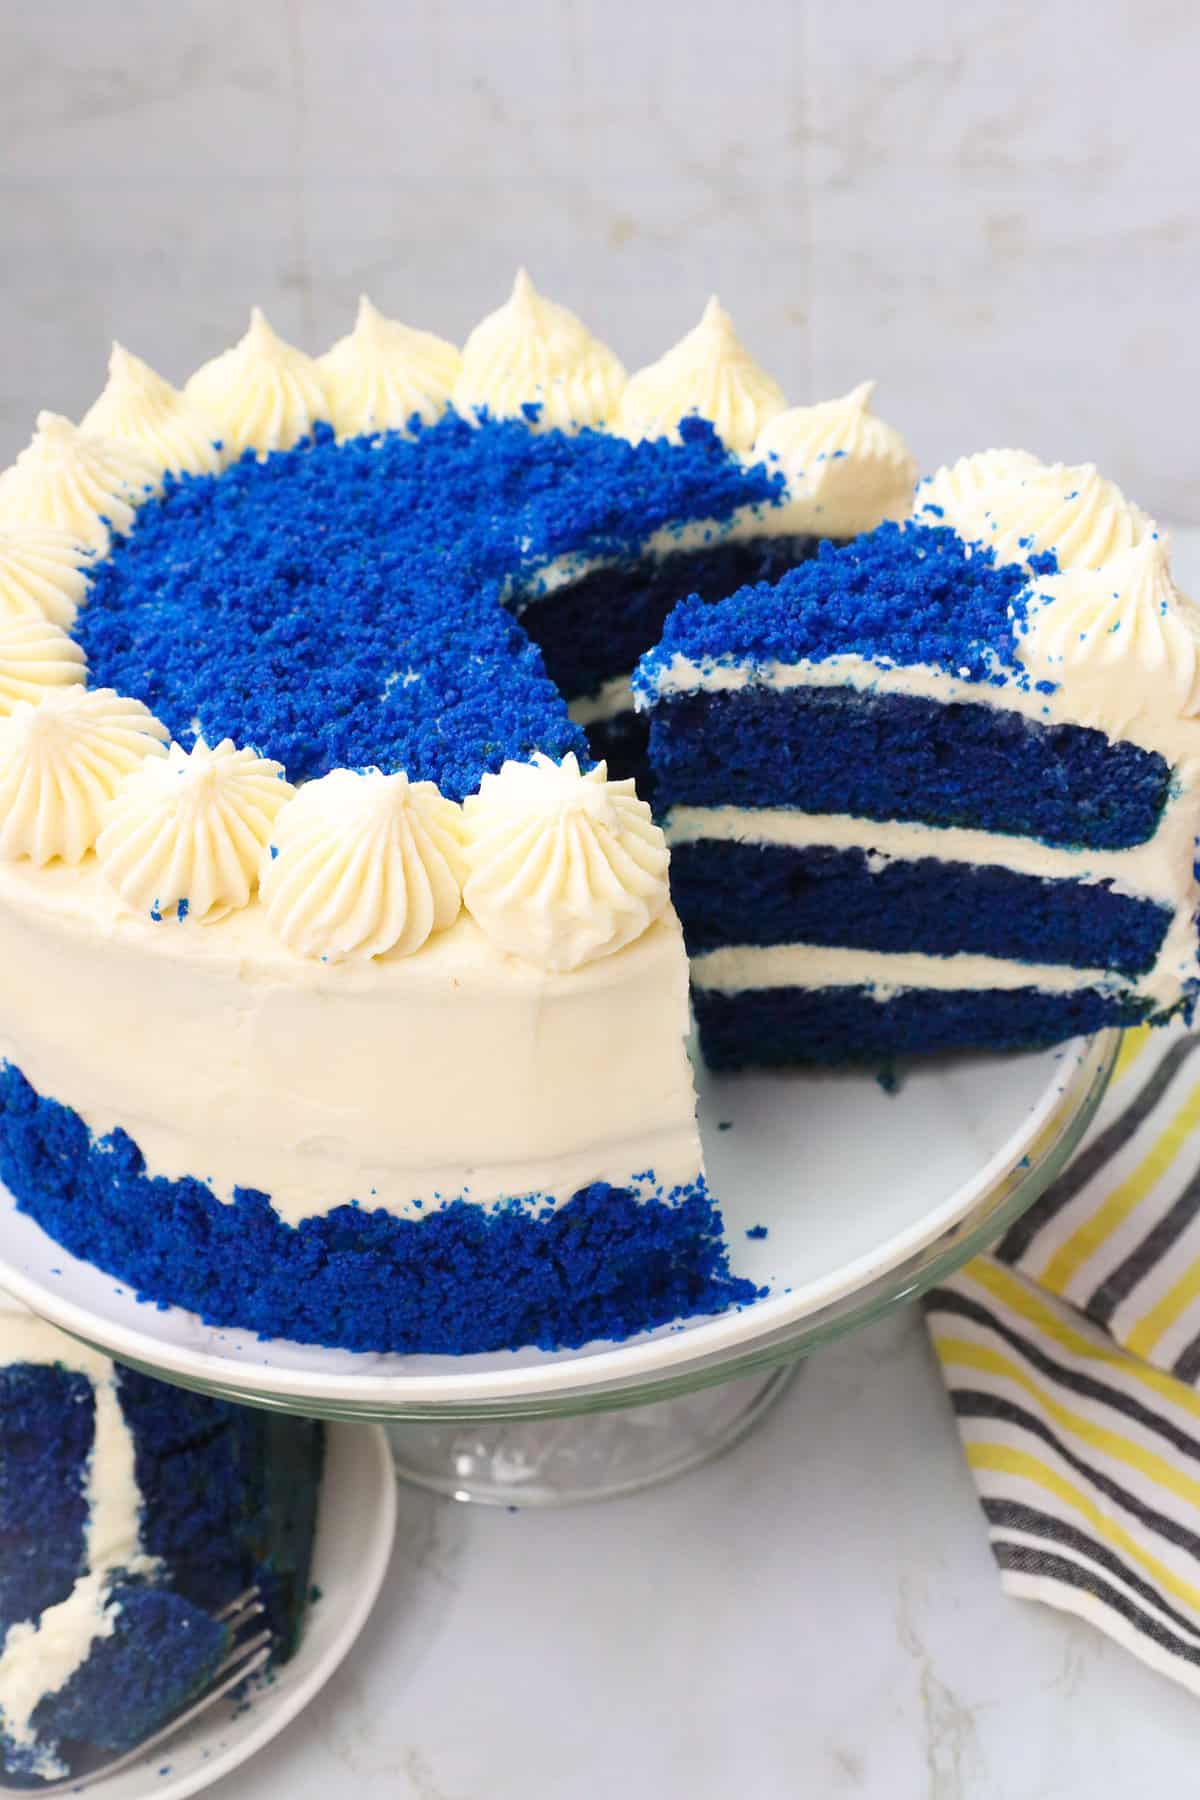
In a word: texture! Blue velvet cake has a smooth, delicate texture different from other cakes. Adding ingredients such as vinegar, buttermilk, cocoa powder, and sour cream breaks down the proteins in the cake flour to create a melt-in-your-mouth-smooth texture. Oh yeah, and the blue-tiful vibrant color is pretty special, too. 😉
Recipe Ingredients
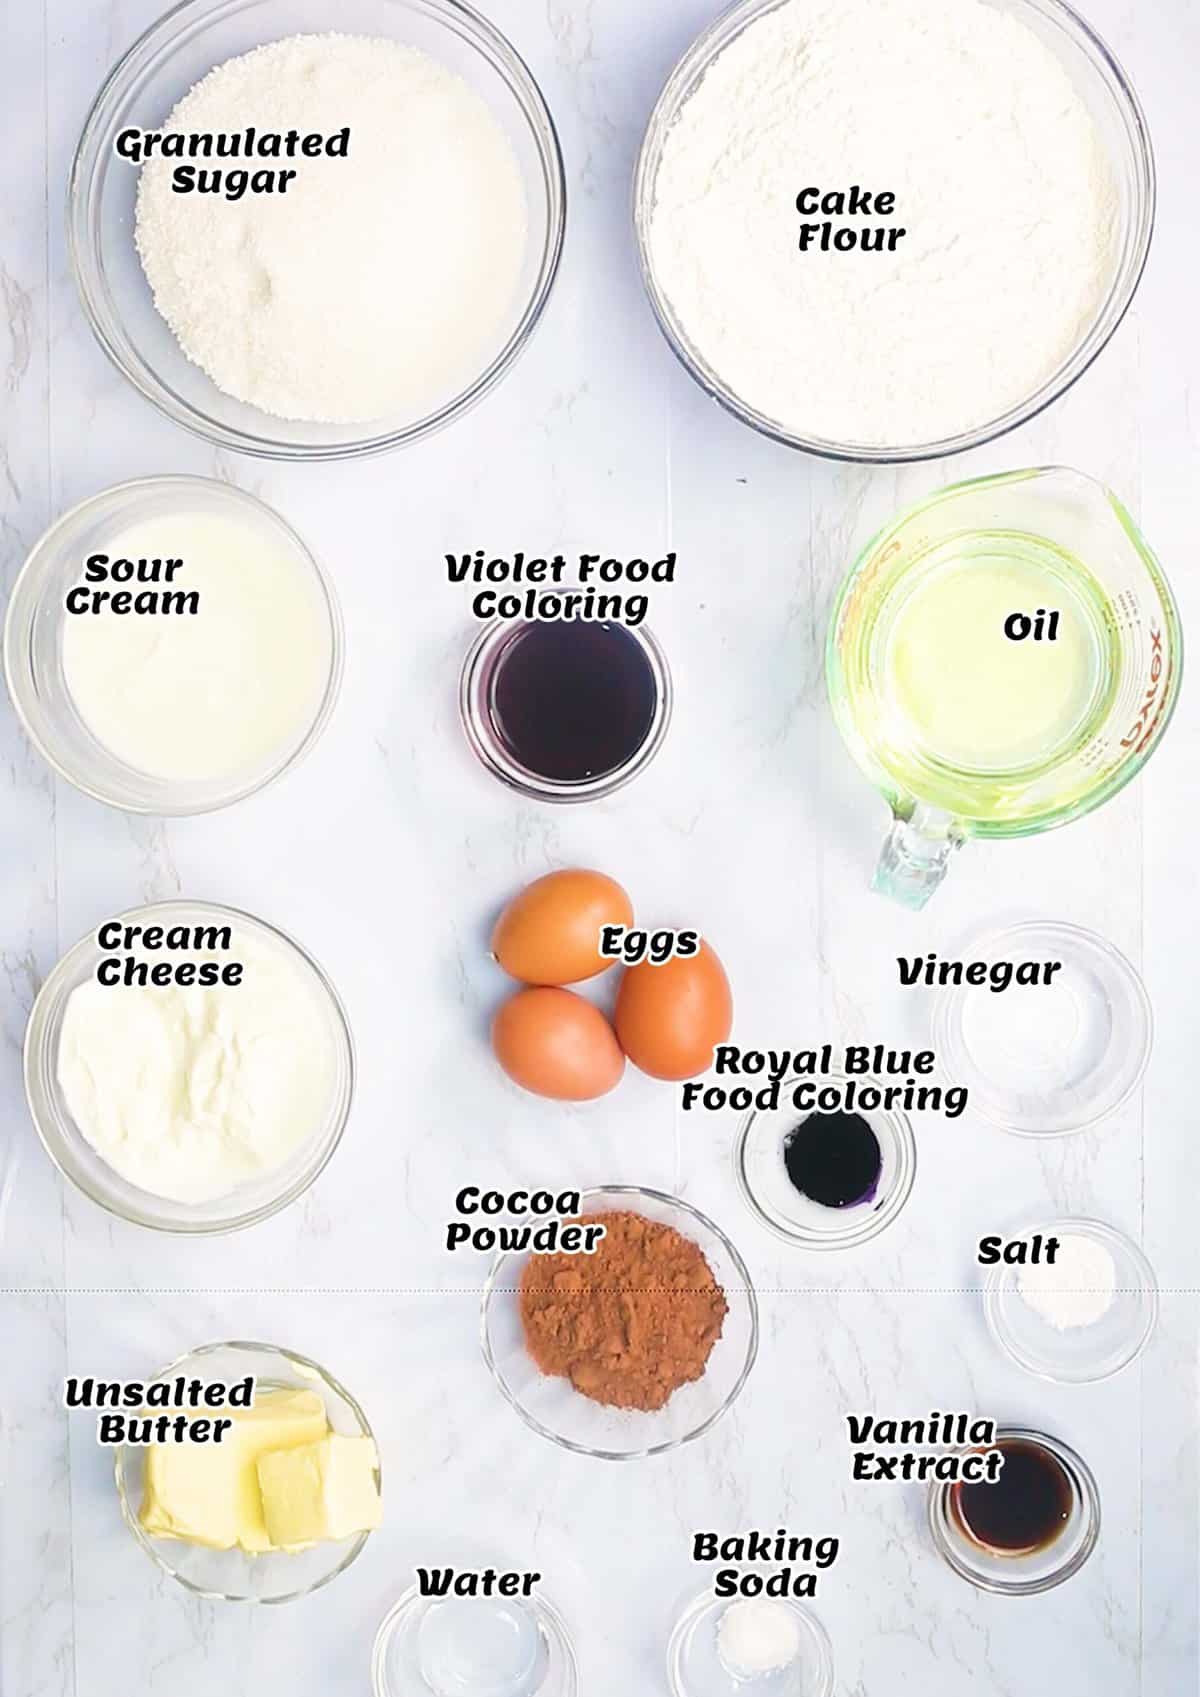
- Cake Flour – A lower protein flour creates a smoother, more even-textured, and tender cake.
- Cocoa Powder – Unsweetened Dutch-process cocoa powder delivers a darker, richer color, but any unsweetened cocoa powder will add chocolatey goodness.
- Butter & Sugar – This duo combines to make the cake buttery and rich.
- Dairy – Sour cream and buttermilk add moisture and activate the baking soda, making the cake light and moist.
- Eggs – The ideal binder keeps your cake together while maintaining the structure after the rise.
- Vinegar – The vinegar’s acidity reacts with the baking soda and helps the cake rise.
- Vanilla Extract – Enhances all the flavors in this delicious cake.
- Food Coloring – Blue food coloring mixes with a touch of violet for that perfect bold color!
- Leavening Agents – Baking powder and soda create the signature velvety texture. Waiting until the end and mixing it with a little water makes a difference in the rising power.
- Frosting – Butter, cream cheese, and powdered sugar is a dynamic trio combined with a splash of vanilla for a creamy, tangy frosting to top this showstopper!
How to Make Blue Velvet Cake
The Cake
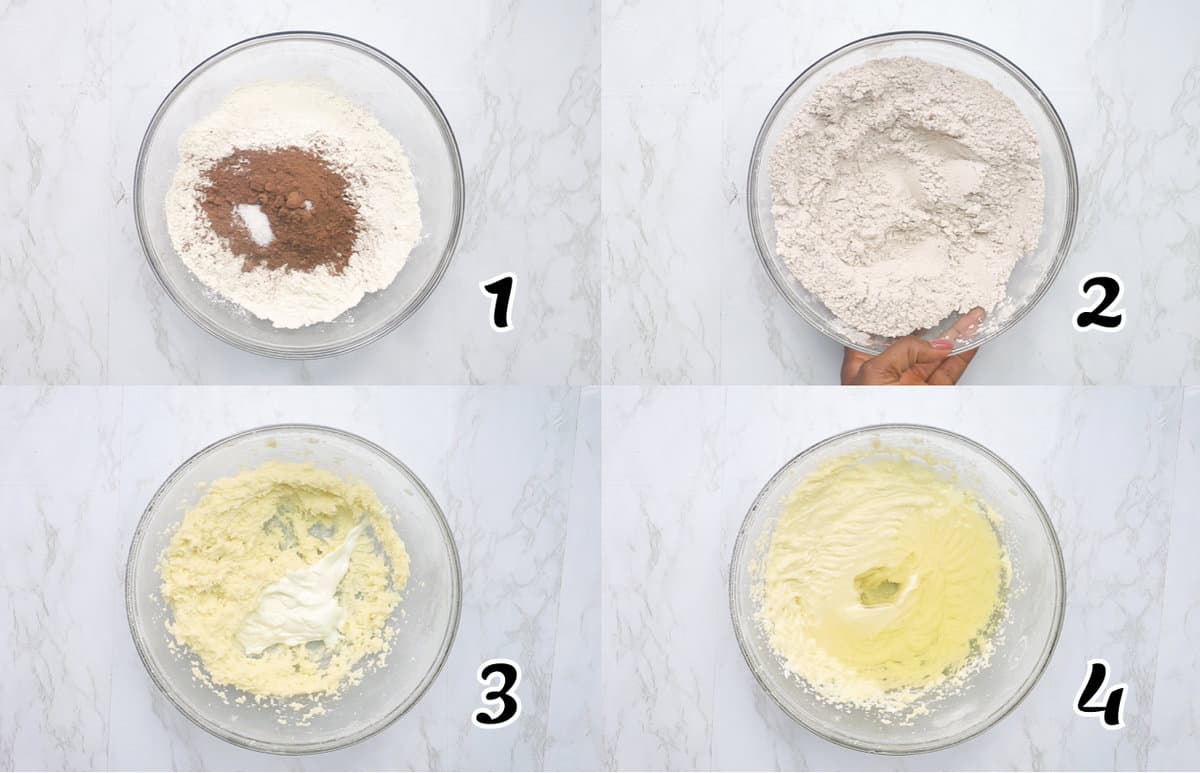
- Dry Ingredients – Combine flour, salt, and cocoa powder in a medium bowl. Set aside. (Photos 1-2)
- Prep the Pans – Preheat oven to 350℉/177℃. Grease three 9-inch round baking pans with baking spray, then line them with parchment paper (if desired) and set aside.
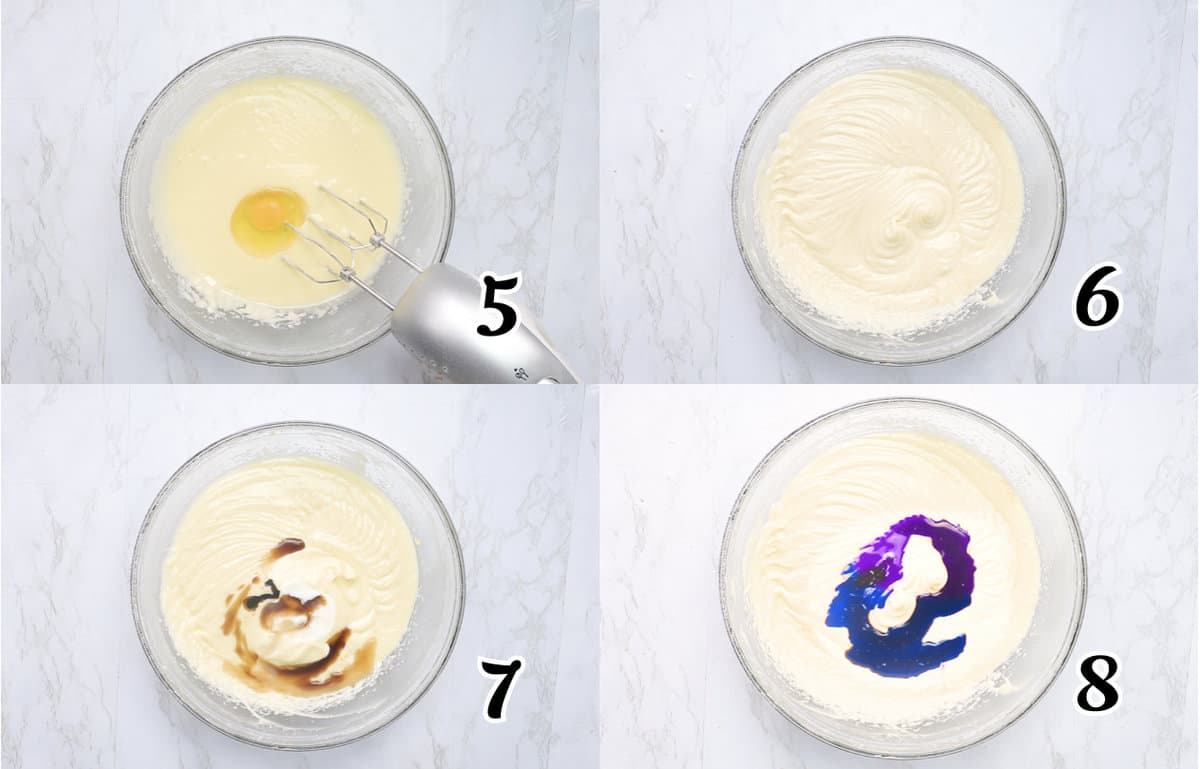
- Wet Ingredients – Cream butter and sugar on high in a stand mixer until fluffy and starts looking white (approximately 4 minutes). Add sour cream and continue mixing for another minute. Follow with the oil, and mix a minute longer. Add the eggs one at a time, beating the mixture well between each addition. (Photos 3-6)
- The Flavor – Next, pour in the buttermilk, vinegar, and vanilla and thoroughly mix. (Photo 7)
- Color – Add food coloring until you reach the desired color. (Photo 8)
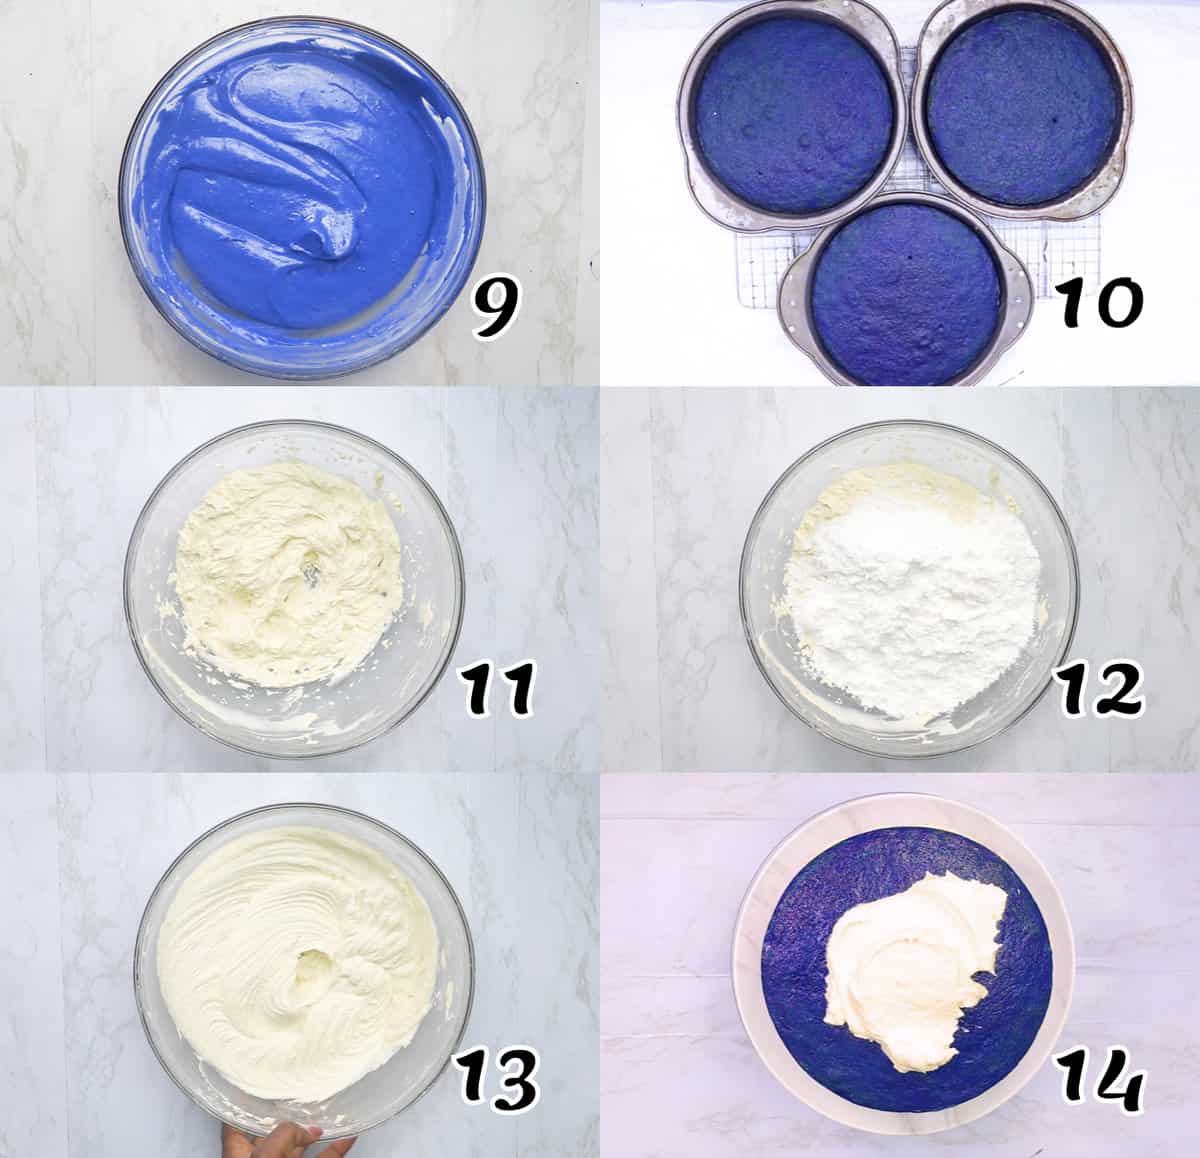
- Combine – Add the flour mixture slowly to the wet ingredients. Then mix the baking soda and powder with the water and gently fold it into the cake batter. Scrape the sides of your mixing bowl down as you go. (Photo 9)
- Bake – Evenly divide your batter between the three pans, and tap on the countertop to release bubbles. Bake at 350℉/177℃ for 25-30 minutes (check for doneness by inserting a knife or toothpick in the cake’s center. If it comes out clean, it’s done).
- Cool – Let the cakes sit in their pans for 10-15 minutes. Gently invert the cake layers on a wire rack and lift off the pans. Once your cake layers have cooled completely, wrap them in cling wrap and chill them in the refrigerator for an hour (preferably overnight) because it makes them much easier to frost. (Photo 10)
Assembling
- Make the Frosting – Whisk cream cheese, butter, and vanilla until creamy with a whisk or electric mixer. Gradually sift in powdered sugar, mixing as you go until smooth. (Photos 11-13)
- Trim the Cake – Level out any domes on your cake with a long knife to make sure they’re completely flat.
- Layer – Gently place one cake layer on a serving platter. Then spread ¾ to 1 cup of cream cheese frosting over it. Top it with the second layer, add frosting, and top it with the third layer. (Photo 14)
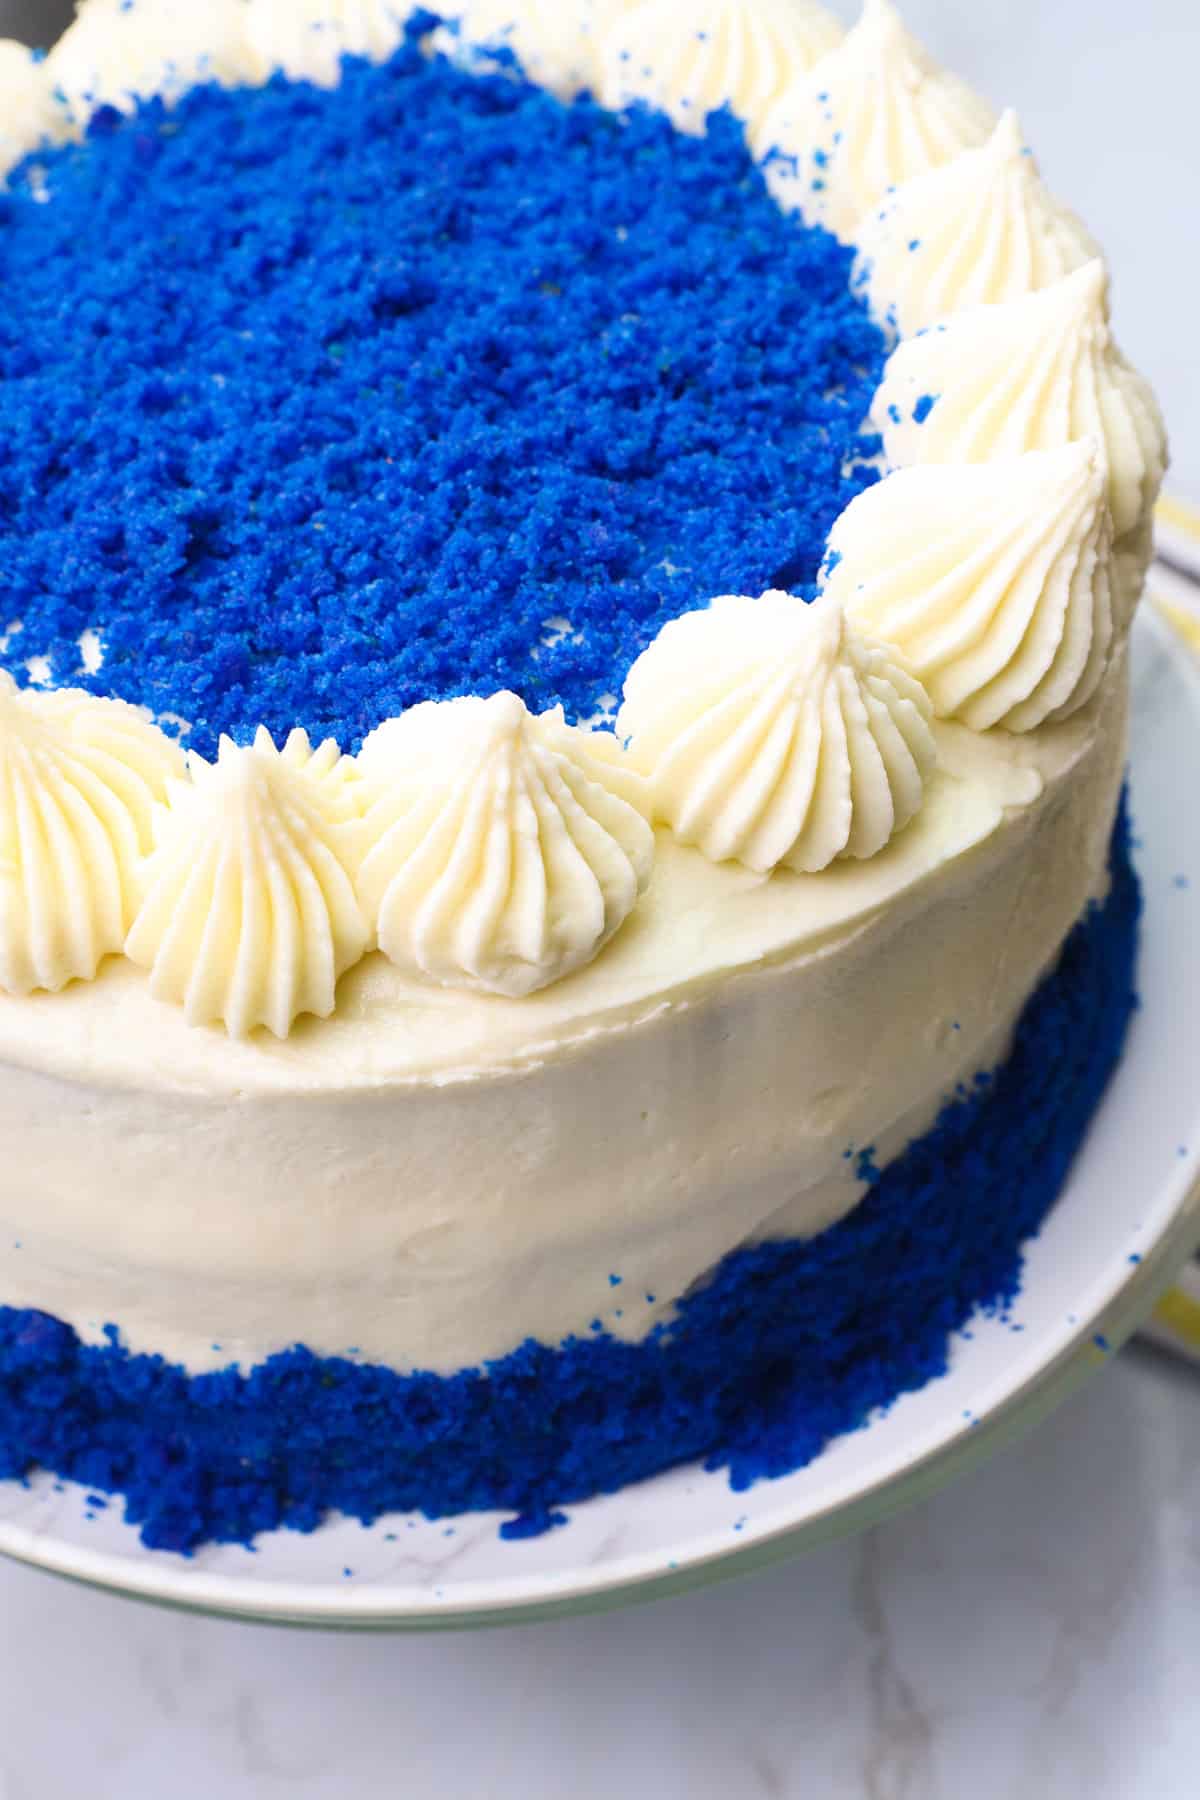
- Final Frosting – Spread the remaining frosting over the top and sides of your blue velvet cake. Pipe on some of the cream cheese frosting and decorate with cake crumbs if you have any.
Recipe Variations
- Looking for a quick, eye-catching decoration? Sprinkle toasted coconut or mini chocolate chips on the top and sides of the cake.
- Add a few blueberries, cherries, or sliced strawberries to each frosted layer for a fresh fruit burst!
- Add blueberry, raspberry, or strawberry flavoring for a fruity suprise.
Tips and Tricks
- No cake flour on hand? Take 2½ cups of all-purpose flour and remove 5 tablespoons. Then add 5 tablespoons cornstarch and sift together.
- If your oven runs hot, test the cake after 25 minutes to see if it’s done.
- Refrigerating the cooled cakes (overnight, if possible) is vital in this recipe. Refrigerated cakes are easier to frost and assemble.
- No buttermilk? No problem! Make a great substitute by adding a teaspoon of vinegar or lemon juice to ½ cup milk. Give it a stir and let sit for 5 minutes before adding it to the batter.
Make-Ahead Instructions
Baking the cake layers the day before is even better. Just wrap them tightly in plastic wrap to keep them moist in the fridge.
The frosting is an excellent make-ahead ingredient too. Keep it in a covered bowl in the fridge. When ready to assemble, let it come to room temperature for about 10 minutes before assembling the cake so it’s easier to work with.
And blue velvet cake is also freezer friendly! Simply wrap the layers tightly, store them in resealable freezer bags, and freeze them for up to two months. Thaw the layers overnight in the refrigerator and assemble the cake before serving.
Serving and Storage Instructions
This kind of cake is best served at room temperature. However, some people prefer it cold. Leftover blue velvet cake keeps well refrigerated for up to 5 days or frozen for 3 months.
FAQs
My go-to is Philadelphia cream cheese for this frosting. But your favorite brand will also work. 😉
When blue food coloring mixes with yellow egg yolks, it can create a greenish tinge. An extra touch of violet food coloring will give you a bolder royal blue color.
Besides the color, red velvet cake and blue velvet cake are the same because they have the trademark velvety texture and rich taste. For fun, you can also garnish blue velvet cake with blueberries and red velvet cake with candied cranberries.
What to Serve With Blue Velvet Cake
This classic Southern dessert is the perfect finale for lobster mac and cheese, garlic bread, and corn on the cob. And, of course, a nice chai tea latte is always welcome.
More Decadent Cake Recipes to Try
- German Chocolate Cake
- Pumpkin Cake
- Red Velvet Cheesecake
- Buttermilk Pound Cake
- Carrot Pineapple Cake
Conclusion
Rich and melt-in-your-mouth Blue Velvet Cake creates a decadent finale for any celebration! When will you treat your guests to this blue-tiful creation? Comment below, and let me know!
Watch How to Make It
[adthrive-in-post-video-player video-id=”1lti2xZ1″ upload-date=”2023-05-15T17:46:52.000Z” name=”BLUE VELVET CAKE UNTITLED.mp4″ description=”Blue Velvet Cake delivers a unique melt-in-your-mouth cake that’s a feast for your eyes and taste buds! ” player-type=”collapse” override-embed=”false”]





What type of vinegar? White vinegar
Hi Linda. Yes, use white vinegar for this recipe. Happy Baking!
Just tried hopefully I did it correctly
Can I use this recipe for cupcakes as well?
Hi Day, Yes, you can. Just adjust the baking time since cupcakes bake faster than a whole cake. Start checking for doneness at around 15-20 minutes, depending on your oven and the size of the cupcakes. Keep everything else the same, like the oven temperature and the batter composition. Enjoy your baking!
I cant wait to try this Blue Velvet recipe. Why did you fold in the baking soda and baking powder at the end? You said it adds to rising power, but why does that only apply to Velvet cakes? Ive never heard this so I’m very interested to try this new technique. Thank you!
Hi Carmen.
I believe this has to do with the acidity of the buttermilk and the cocoa powder. By folding in the baking powder and baking soda at the end, you are ensuring that their leavening power is fully utilized when the batter is baked. If you add them earlier on in the mixing process, they may react too soon and lose some of their ability to help the cake rise, resulting in a dense cake.
I hope this helps! Do let me know how it turns out for you!
I am in love with this color and plan to bake it for a ladies get together this
Friday for that WoW affect!
Hi Harlene,
That sounds like a fantastic plan! A blue velvet cake is sure to create a stunning visual impact with its vibrant color, making it perfect for a ladies’ get-together where you’re aiming for that “wow” effect. Its unique appearance, paired with delicious flavors, will undoubtedly be a conversation starter and a memorable centerpiece for your event. Have a great time baking and enjoy your gathering on Friday!
Will this coloring cause your lips to turn blue?
Yes it does, but for only a short time. It’s fun for kids’ parties:)
Recipe sounds delish! If using the recipe for cupcakes, should the cupcakes be refrigerated overnight before frosting?
Hi Tamika. You can refrigerate for a couple of hours or overnight. As long as it is cool enough for the frosting to hold and not melt :).
If I were to make this recipe in a 9×13 sheet pan would I half the recipe? Or what would the ratios be
It’s more like ⅔ of the batter. You could make the 9×13 sheet cake, and divide the leftover third of the batter in a muffin tin. Please let me know how it turns out.
Please add quantity of OIL.
Thank you for catching that. It has been fixed.
What kind of oil should I use. Is canola oil ok?
Yes . Canola oil works just as well.